Overview
In this article, our focus will be on creating a MySQL instance in Google Cloud using Cloud SQL. We will then proceed to create a database connector in webMethods.io and demonstrate the process of inserting records from webMethods.io into the MySQL database. The configuration we are about to perform for creating the database in the Cloud Console is a fundamental process, and it can be customized based on the specific requirements of a real-life project.
Create MySQL instance in Google Cloud SQL :
- Log in to your Google Cloud console.
- Navigate to the menu and locate the ‘SQL‘ option. Upon clicking it, you will find a button to create the instance. Click on it to proceed.
- You will now observe the MySQL, PostgreSQL, and SQL Server databases listed. choose MySQL.
- Once you land on the instance creation page, fill in the following details. Please note that these are the basic configurations, and you can select the memory and other resources based on your project requirements.
- Instance ID: Provide an ID to your MySQL instance.
- Password: Choose a password for your instance.
- Choose a Coud SQL Edition: Enterprise.
- Presets: Select Sandbox.
- Machine configuration :1 vCPU 3.75 GB.
- Storage Capacity: 10GB.
- Instance IP Assignment > Authorized networks: Add a new network, assign it a name, and in the network field, enter 0.0.0.0/0 to enable WebMethods.io to connect to MySQL running in GCP.
- Click on the Create Instance button.
- Please wait a few minutes for the MySQL instance creation process to complete.
Create Database and table using Cloud Shell :
- Open the Cloud shell from the cloud console, if it asks you to authorize then click on the authorize button.
- Execute the below command to log in to the MySql instance, please update the MySQL instance ID and project id.
gcloud sql connect your_instance_name --user=root --project your_project_id
- Once you execute the command it will take you to the MySql command line.
- Execute the following SQL queries to create a database, table, and insert one record into the table.
Create database Harmonigate; use Harmonigate; Create table Employee (Emp_name varchar(20),Emp_id varchar(10) PRIMARY KEY); Insert into Employee values('Rajesh Sahoo','1'); - Once you execute the above SQL queries, we are ready to create the database connector.
Create Database connector in webMethods.io :
- Navigate to webMethods.io integration.
- In the project tab click on the plus icon to create a project and give it a name.
- Navigate to the connector tab in the project and in the right-side panel use the search functionality to find the database connector.
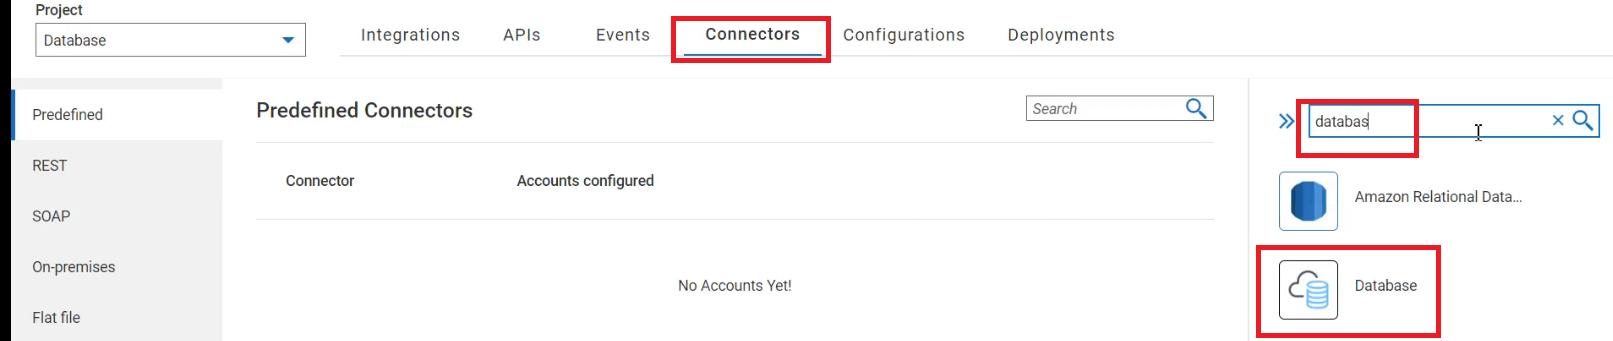
- Click on the Database connector and give it an appropriate name.
- In the Basic Configuration section fill below details.
- Database: Select the MySQL database.
- Driver Group: Click on the plus icon, provide a name for the driver, and proceed to upload the JDBC JAR. Navigate to the MySQL download page, download the JAR, and upload it here. Please note that you can only upload certified JARs approved by webMethods.io. Refer to the webMethods.io documentation portal for the list of certified JARs.
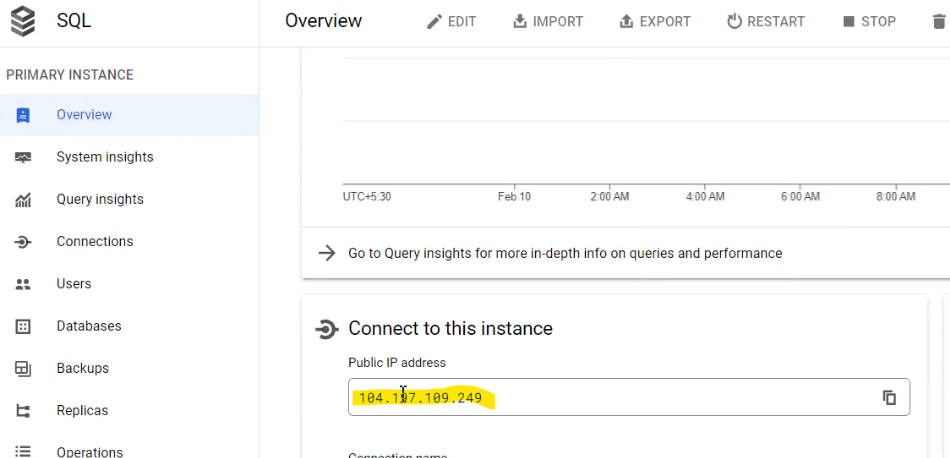
- Server name: Navigate to the GCP Cloud SQL page collect the public IP address and paste the same here.
- User: root.
- Password: provide the password that you have selected while creating the MySQL instance.
- Database Name: Provide the database name that we have created in the earlier step.
- Once you filled in the above information click the next button.
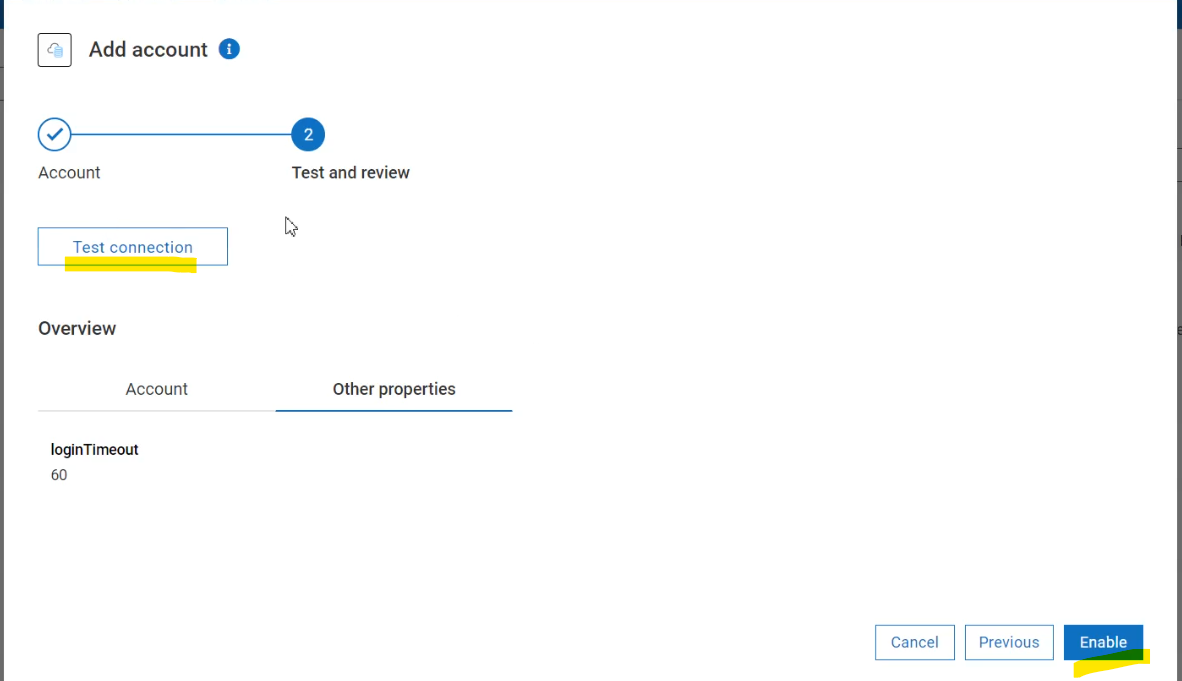
- Click on the Other Properties tab and then click the Test Connection button.
- Test connection should be successful then click on the enable button.
Insert row to Employee table from WebMethods.io :
- In the webMethods.io environment get into the project where we have created database connector.
- Navigate to the integration tab and create a flow service by navigating to the Flow Services tab.
- In the flow service, search for the database, click on the ‘Add Custom Action‘ button, and configure the following properties.
- Action Name: provide a name to the action.
- Description: Provide some description.
- Connect to Account Database: Select the database connector that we created earlier and click next.
- Select Action: Select Insert template and click next.
- Tables and views are synonymous: Click on the plus icon, select the table, and click the ‘Add’ button.

- Insert: Click on the plus icon and select the field that we will be passing to insert the record into the table in the same way that we did previously.
- Execution parameters: Set the Row count field name to count and filed type as a string.
- Click next and then you will observe the SQL statement, click the done button.
- Click on the I/O button of the flow service and create two variables of type string. These variables will be used to pass the data to be inserted into the table.
- Now map the input fields to the input document and save the changes.
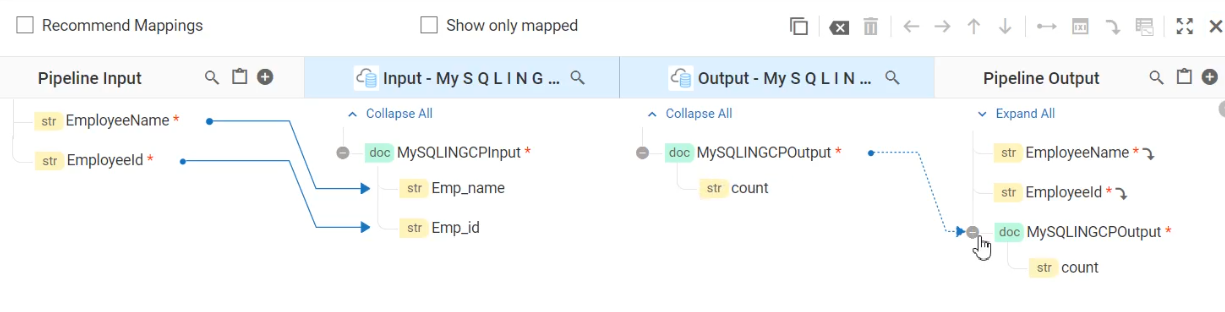
- Now run the flow service and pass the EmpleeName and EmployeeId and you will observe the count as 1.

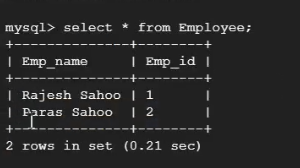
- Navigate to Cloud Shell and execute a SELECT query against the Employee table, you will observe that the record has been inserted into the table.
Hope you have enjoyed this article, Cheers!