Get the Full Course on Udemy!
Subscribe or enroll now and access all lessons instantly from any device.
Overview :
In this article, we will explore the use of API Gateway, delve into its architecture, and walk through all the steps involved in installing it within a Docker container. We will create our first REST API in API Gateway and gain an understanding of the various authentication mechanisms available.
Prerequisites :
- Docker should be installed and running.
- Basic understanding of container architecture.
Why API Gateway :
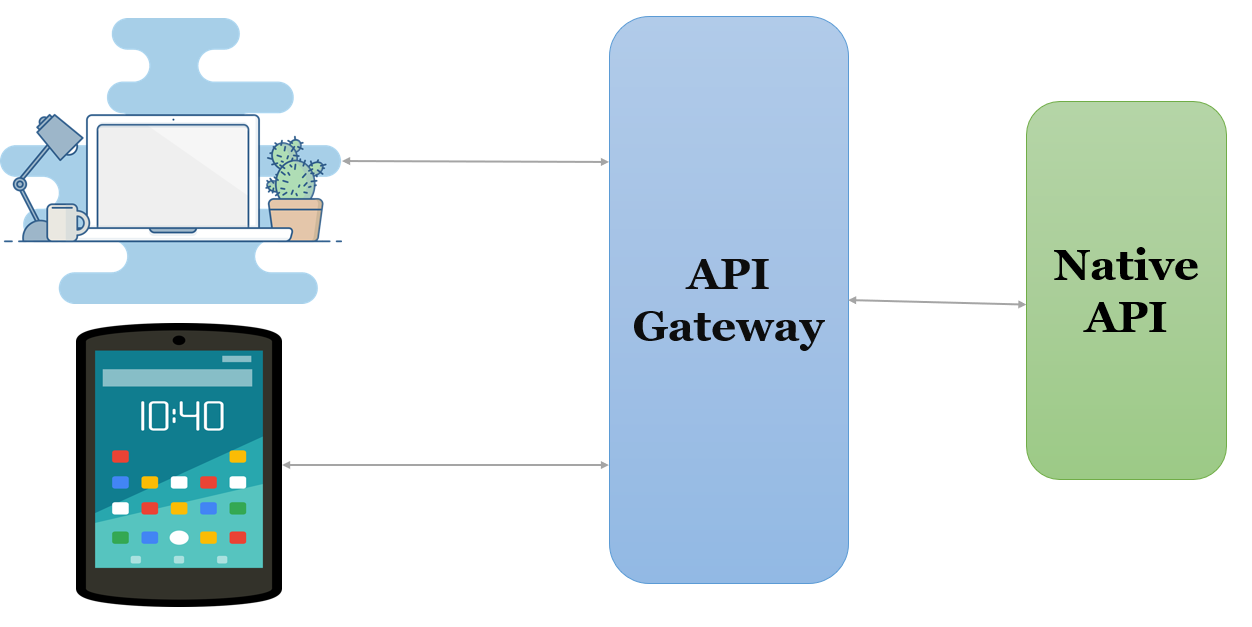
API Gateway is a server that acts as an entry point for multiple APIs. It functions as a traffic cop, managing and directing requests from clients to the appropriate backend services or microservices. API Gateways often handle tasks such as authentication, authorization, rate limiting, and request/response transformations. They provide a centralized point of control for managing, securing, and optimizing communication between different parts of a software application or between different applications. Essentially, an API Gateway simplifies the process of interacting with various APIs by offering a unified interface and managing the complexities of API communication.
We can make use of API Gateway from the SoftwareAG cloud as well but in this article, we will install it in the docker container and see the demo.
API Gateway Installation in Docker :
As part of this article, we will pull the Api Gateway image from the docker hub and install it in docker.
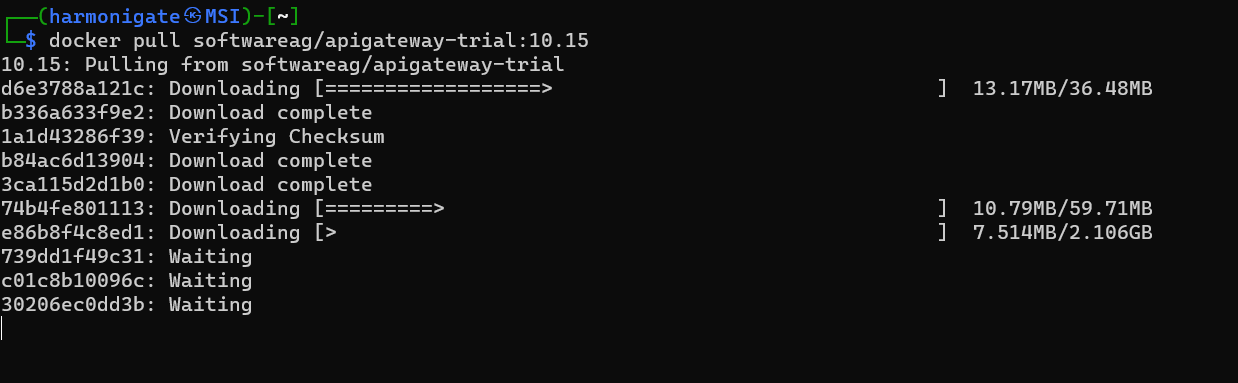
- Use the below command to pull the Api Gateway free trial image from the docker hub.
docker pull softwareag/apigateway-trial:10.15
docker pull: Initiates the process of downloading a Docker image.softwareag/apigateway-trial: Specifies the name of the Docker image.10.15: Refers to the version or tag of the Docker image.
- Downloading the image will take some time, and the duration will depend on your internet connection.
- Once the image download is complete, you can start a container using the downloaded image. However, before doing so, ensure that the vm.max_map_count kernel setting is configured to a minimum of 262144. This adjustment is necessary because API Gateway includes Elasticsearch, and the Docker host should have a main memory of at least 4 GB.
sysctl -w vm.max_map_count=262144
- Execute the below command to start the container.
docker run -d -p 5555:5555 -p 9072:9072 --hostname localhost --name apigateway softwareag/apigateway-trial:10.15
docker run: Initiates the creation and execution of a Docker container.-d: Runs the container in detached mode, meaning it runs in the background, and the terminal remains available for further commands.-p 5555:5555 -p 9072:9072: Maps the host machine’s ports to the container’s ports. In this case, IS will run in 5555 and the API Gateway will run in 9072 port.--hostname localhost: Sets the hostname of the container to “localhost“.--name apigateway: Assigns the name “apigateway” to the container.softwareag/apigateway-trial:10.15: Specifies the Docker image to be used for creating the container.
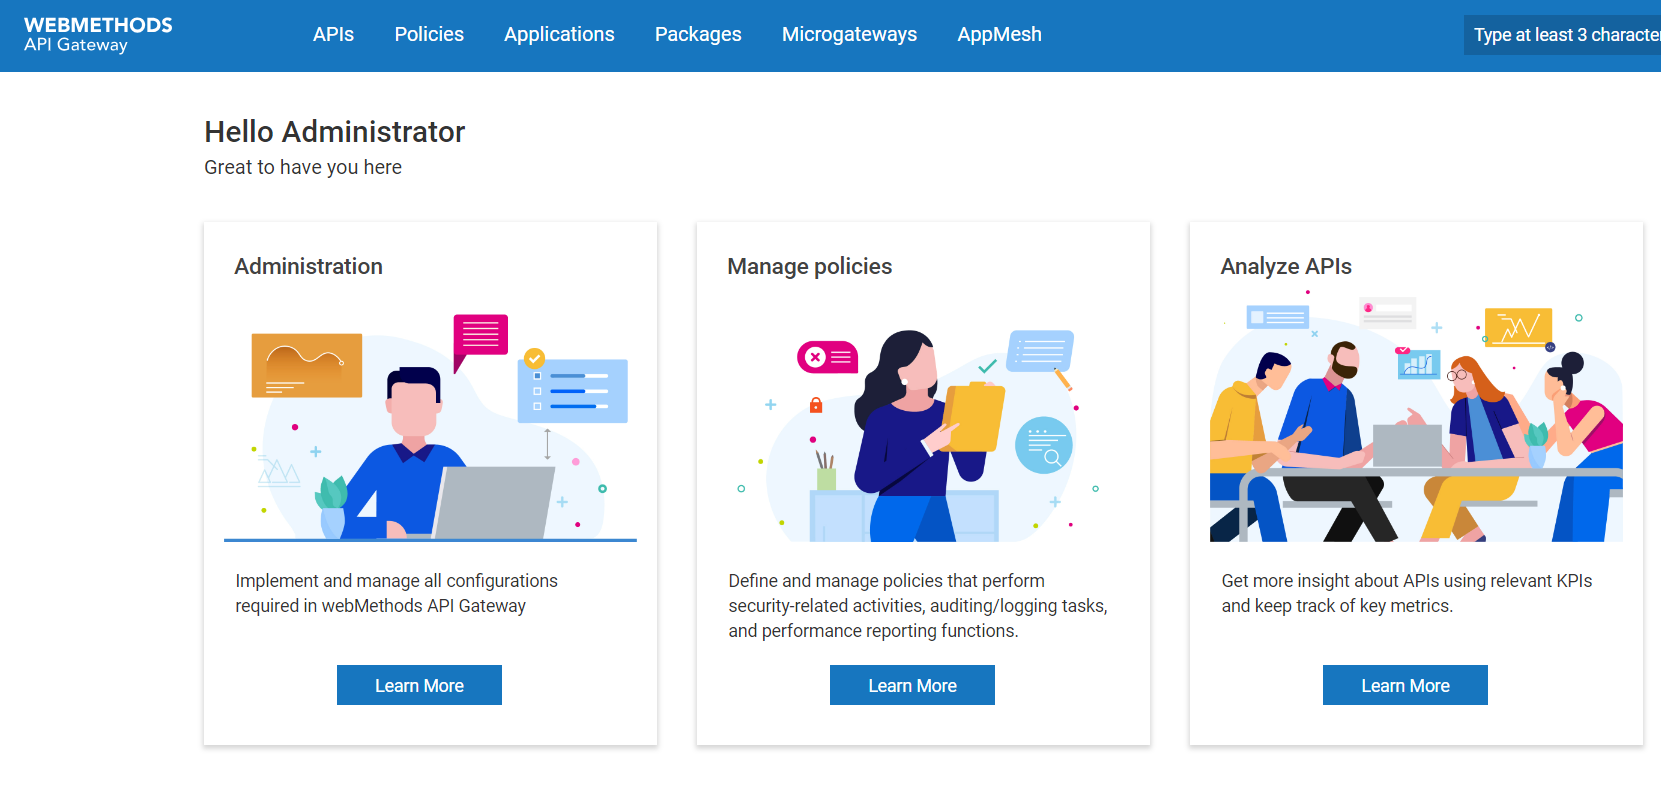
- After executing the above command, wait for some time, and then navigate to your local machine’s port 9072. You will see the API Gateway up and running.
- Once API Gateway is up then login with userID as “Administrator” and password as “manage“.
Create your First API in API Gateway :
As part of this article, we will import the Petstore API using the swagger URL and try to invoke it via API Gateway.
- In the API Gateway home page click on the “APIs” link available in the navigation bar.
- Click on the “Create API” button available at the right top of the page.
- Select ‘Import API from URL‘ option and fill below details to import the PetStore API from the Swagger URL.
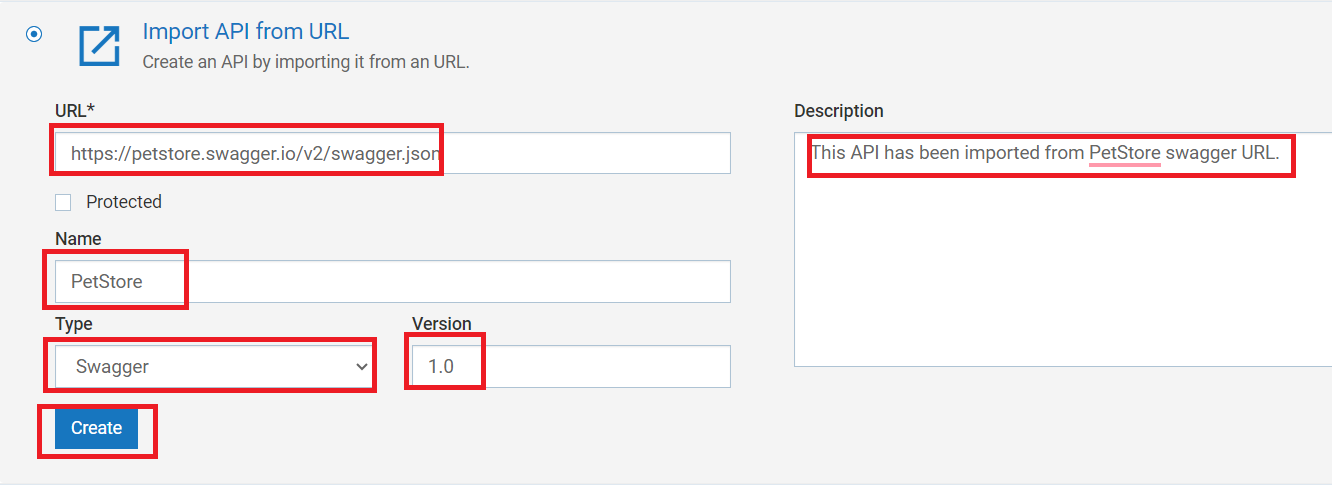
- URL: Specify the URL from which the API will be imported. Supported types include RAML, Swagger, WSDL, OpenAPI, OData, and GraphQL SDL.
- Protected: Select this option to make the API a protected API.
- Name: Give a name to your API.
- Type: Select the type based on the URL given.
- Version: Provide a version to your API.
- Description: Provide some description to your API.
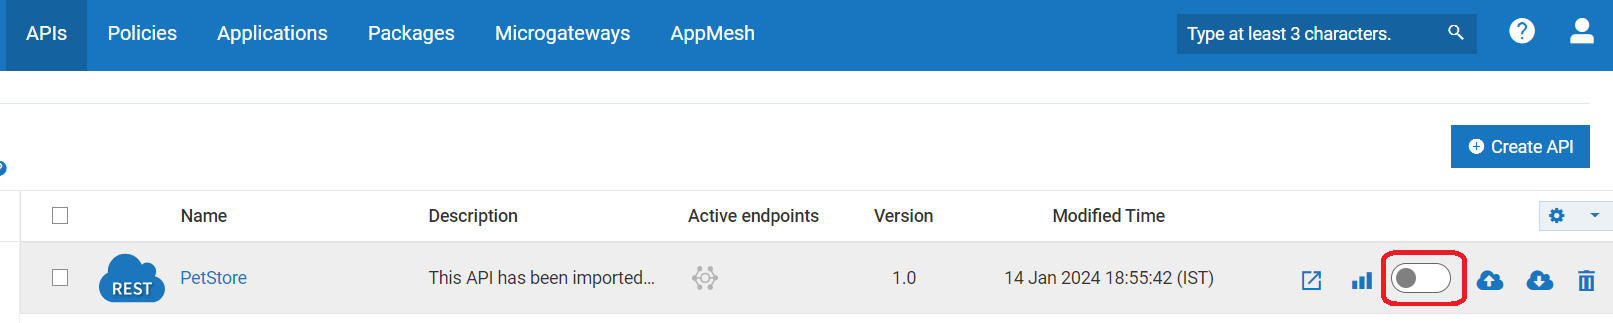
- Once you create the API it will be available in your ‘APIs‘ section.

- We need to enable the API in the API Gateway to view the endpoint for the PetStore API. This can be done from the ‘APIs’ section or by using the ‘Activate’ button inside the API.
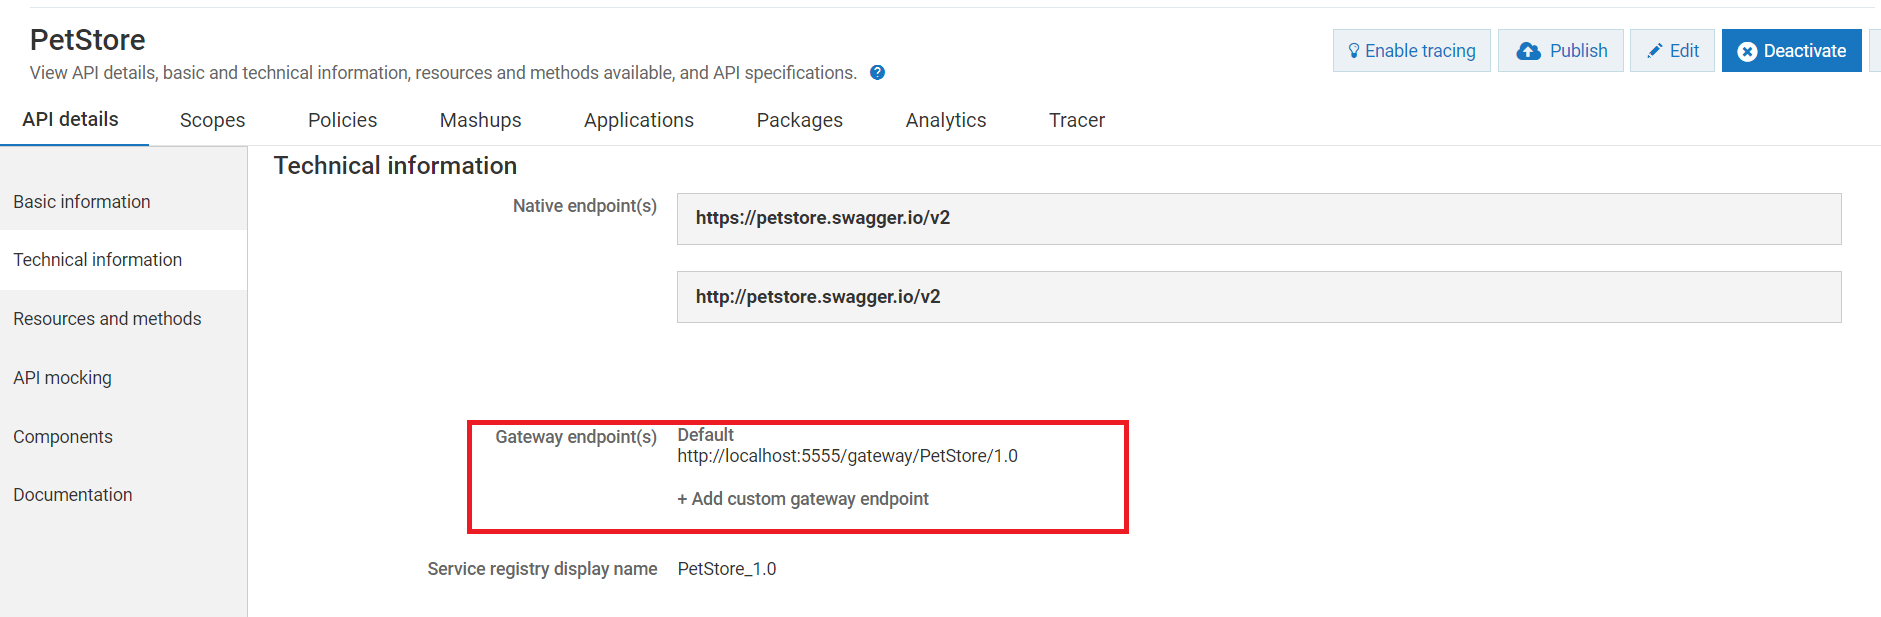
- Enable the API using the toggle button and get inside the API and you will able to view the API Gateway endpoint for this API.
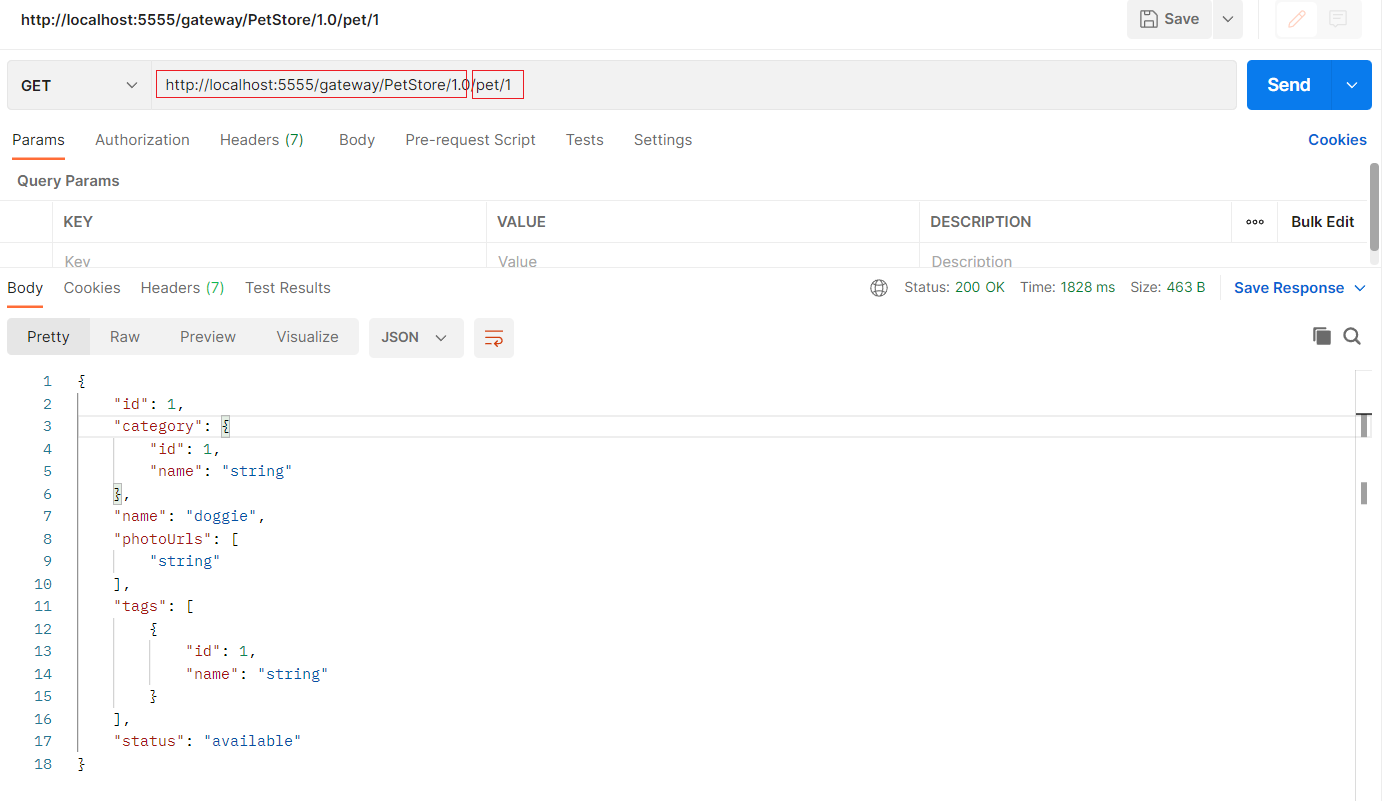
Consume API in using Postman :
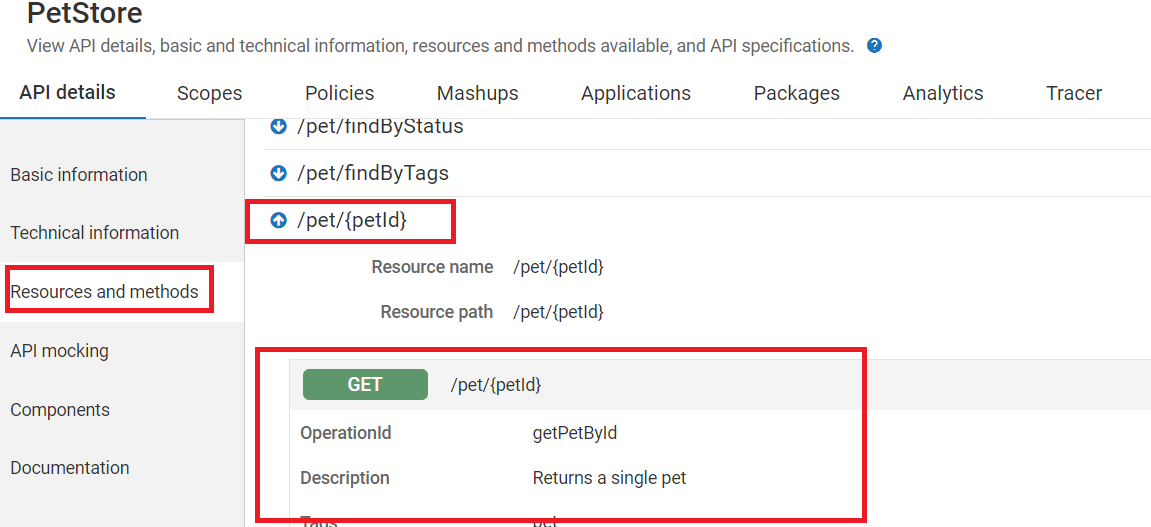
We will use the /pet/{petId} resource for this demo. Feel free to explore other resources as well, you can view all resources and methods in the ‘Resources and methods‘ section of the API.
- Open the Postman application and make an API call using the format below. No authentication details are required, as none have been imposed.
We have successfully completed the installation, created an API, and tested it. In the upcoming article, we will explore various options available in the API Gateway for an API and implement different mechanisms to protect the API.