Overview
Kestrel Gateway is an API gateway solution that gives developers a central control point between API consumers and backend services. Instead of adding authentication, traffic controls, routing rules, logging, and error handling separately to every service, teams can configure these capabilities once at the gateway layer.
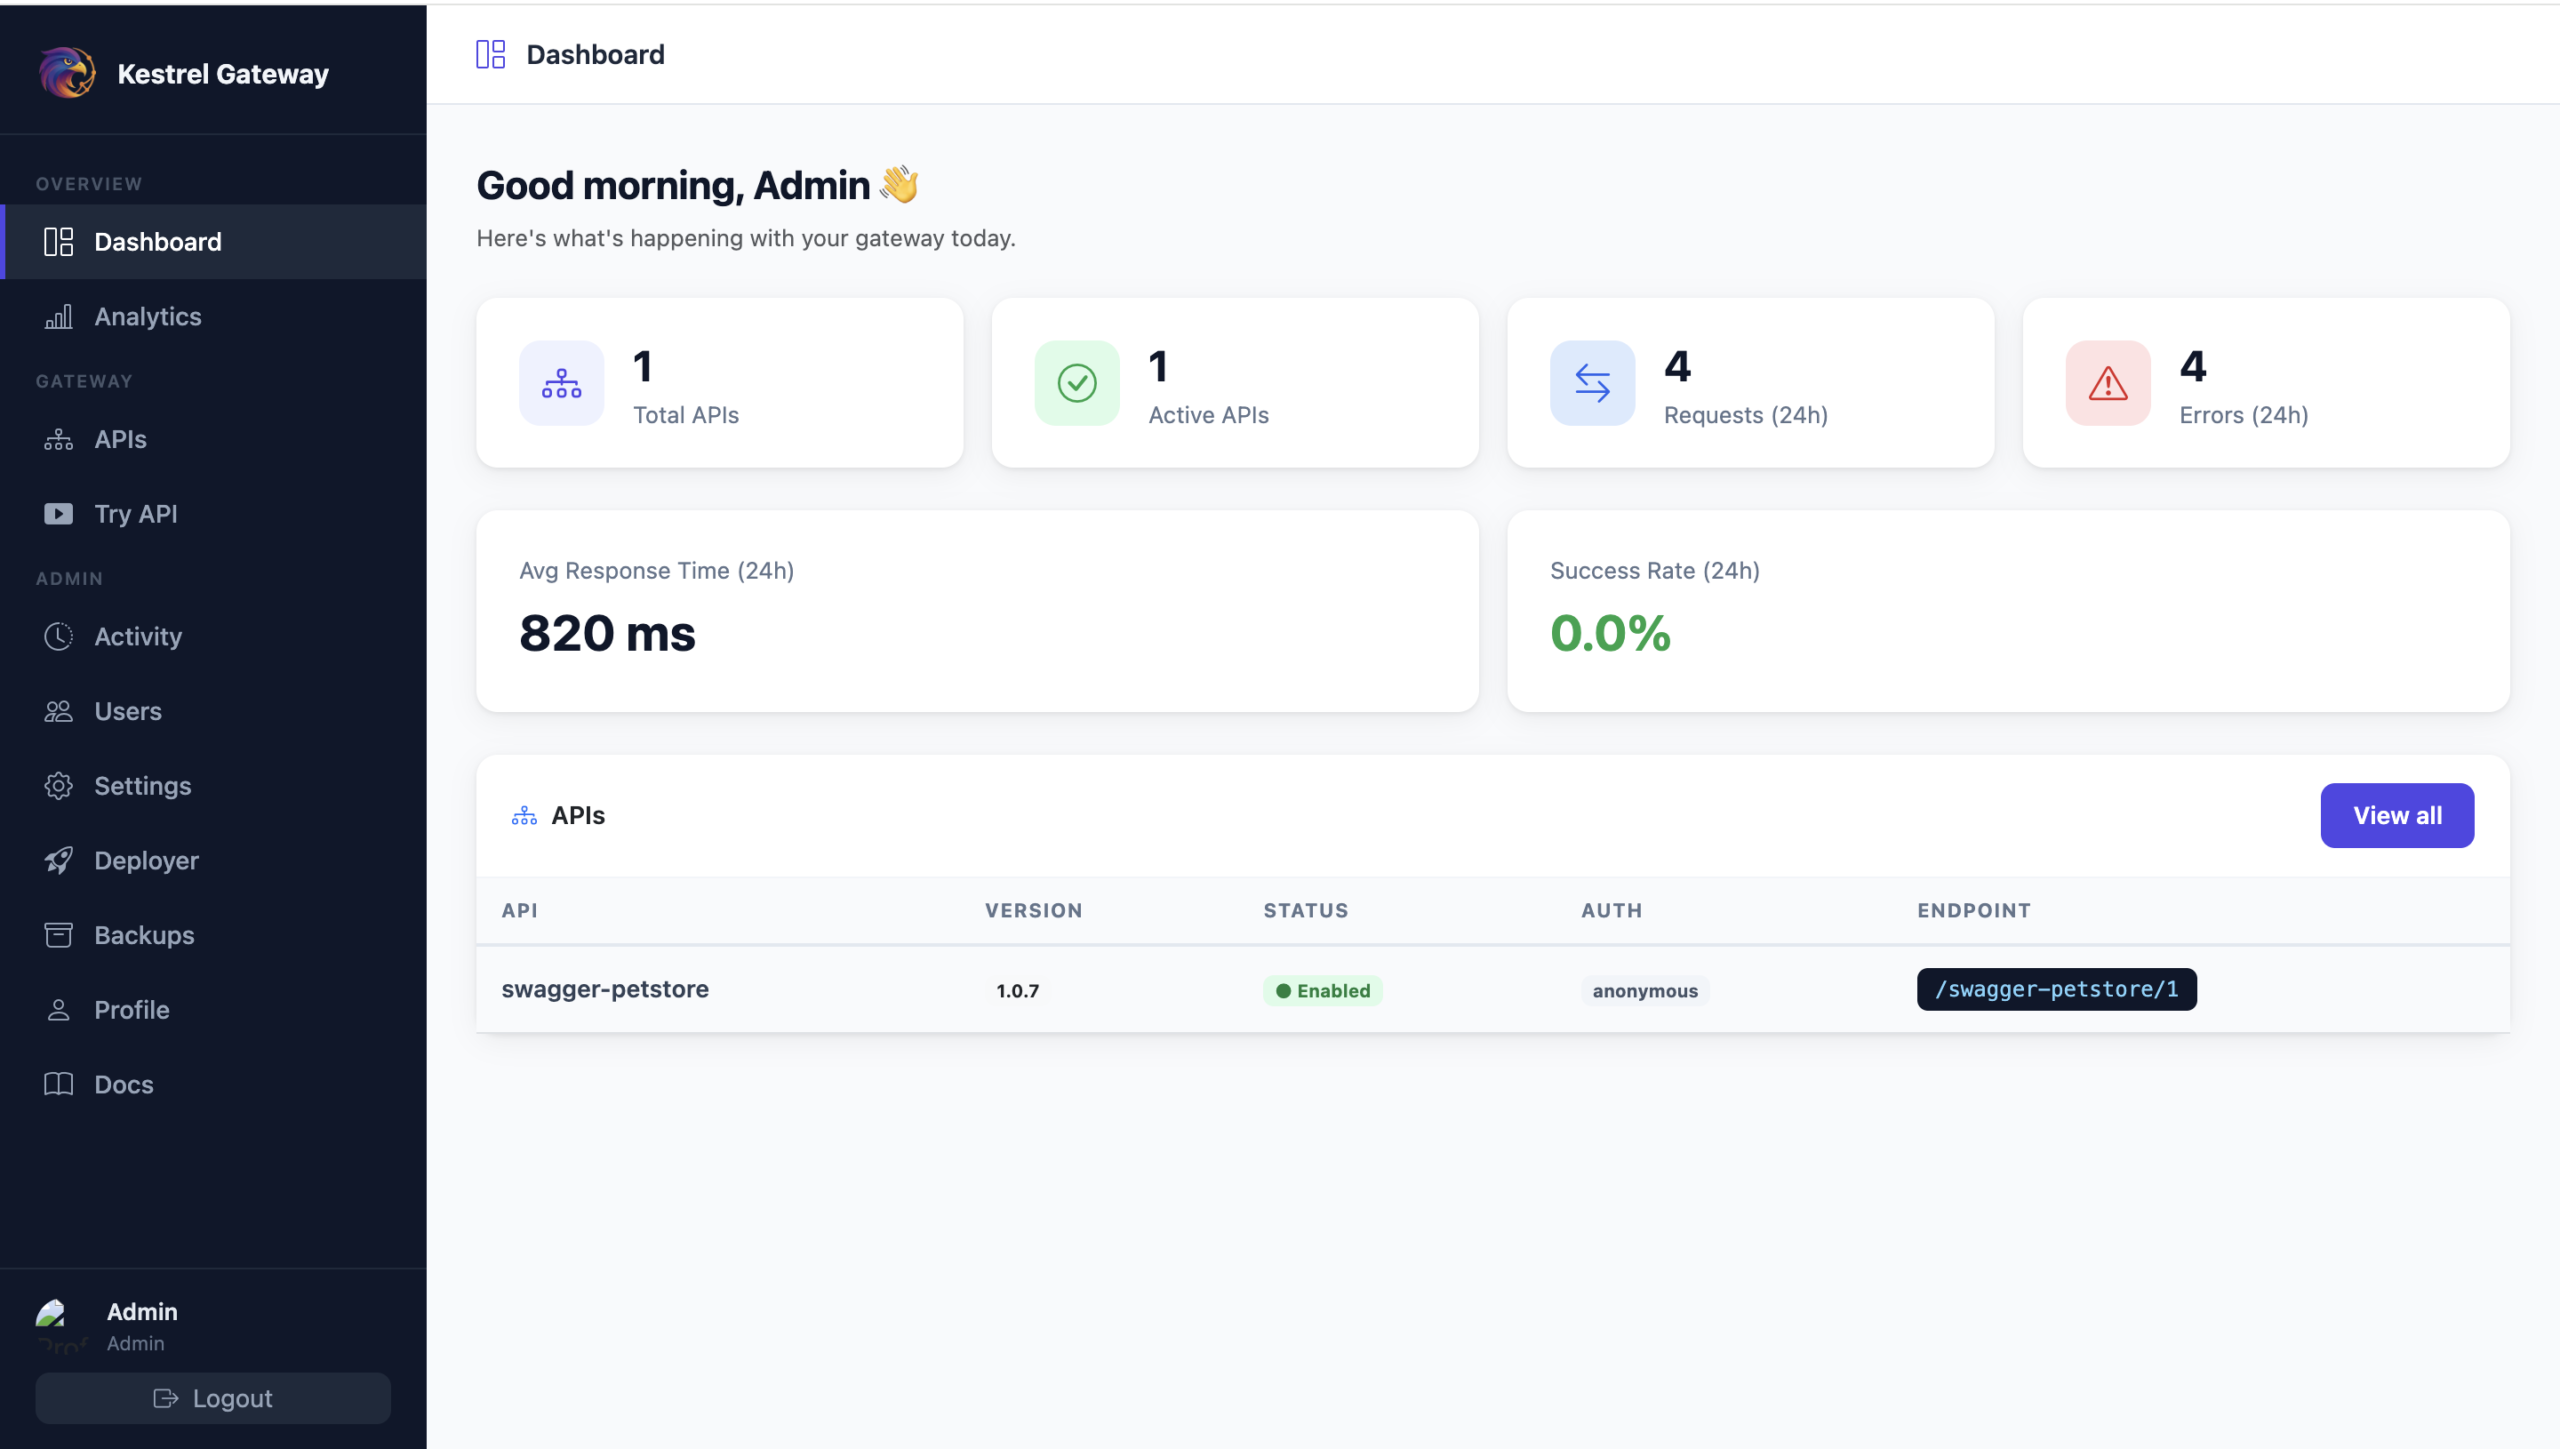
The project combines a browser-based management portal, a management API, a MongoDB configuration store, and a runtime proxy. Developers can define an API in the portal, attach reusable policies, and expose a consistent public route without changing the backend service itself.
Why Is an API Gateway Needed?
As an application grows, clients rarely communicate with only one backend. A web application, mobile application, partner integration, or automation client may need to call several services, each with different addresses, authentication methods, naming conventions, and operational limits. Connecting clients directly to every service creates tight coupling and pushes infrastructure concerns into application code.
An API gateway provides one stable entry point and separates public API behavior from the implementation details of backend services. It is especially useful when you need to:
- Hide internal service locations: consumers call a gateway URL rather than learning private backend hosts and ports.
- Apply consistent security: authenticate consumers and restrict source networks before requests reach backend systems.
- Control traffic: protect services from accidental or abusive request volumes with rate limits.
- Version APIs: publish stable versioned routes while backend services evolve independently.
- Centralize routing: direct requests according to path, method, headers, and reusable backend definitions.
- Improve visibility: collect request activity and analytics in one place rather than examining every service separately.
- Standardize the developer experience: provide generated routes, test tools, exports, and documentation from a shared portal.
As an API gateway solution, Kestrel Gateway places these responsibilities in a manageable layer that is small enough to run locally with Docker and practical enough for development labs, internal tools, prototypes, demonstrations, and controlled environments.
How the Gateway Fits into an Application
| Component | Default Port | Purpose |
|---|---|---|
| Management portal and API | 4000 | Configure APIs, aliases, users, policies, imports, exports, backups, and analytics. |
| Gateway runtime | 4001 | Receives consumer traffic, evaluates configured rules, and proxies approved requests. |
| MongoDB | 27017 inside Docker | Stores gateway configuration and operational data. |
| Backend services | Application-specific | Receive requests from the gateway after policies and routing rules are evaluated. |
http://YOUR_SERVER_IP:4001/<api-name>/<version>/<resource>Features Provided by Kestrel Gateway
1. Central API Management
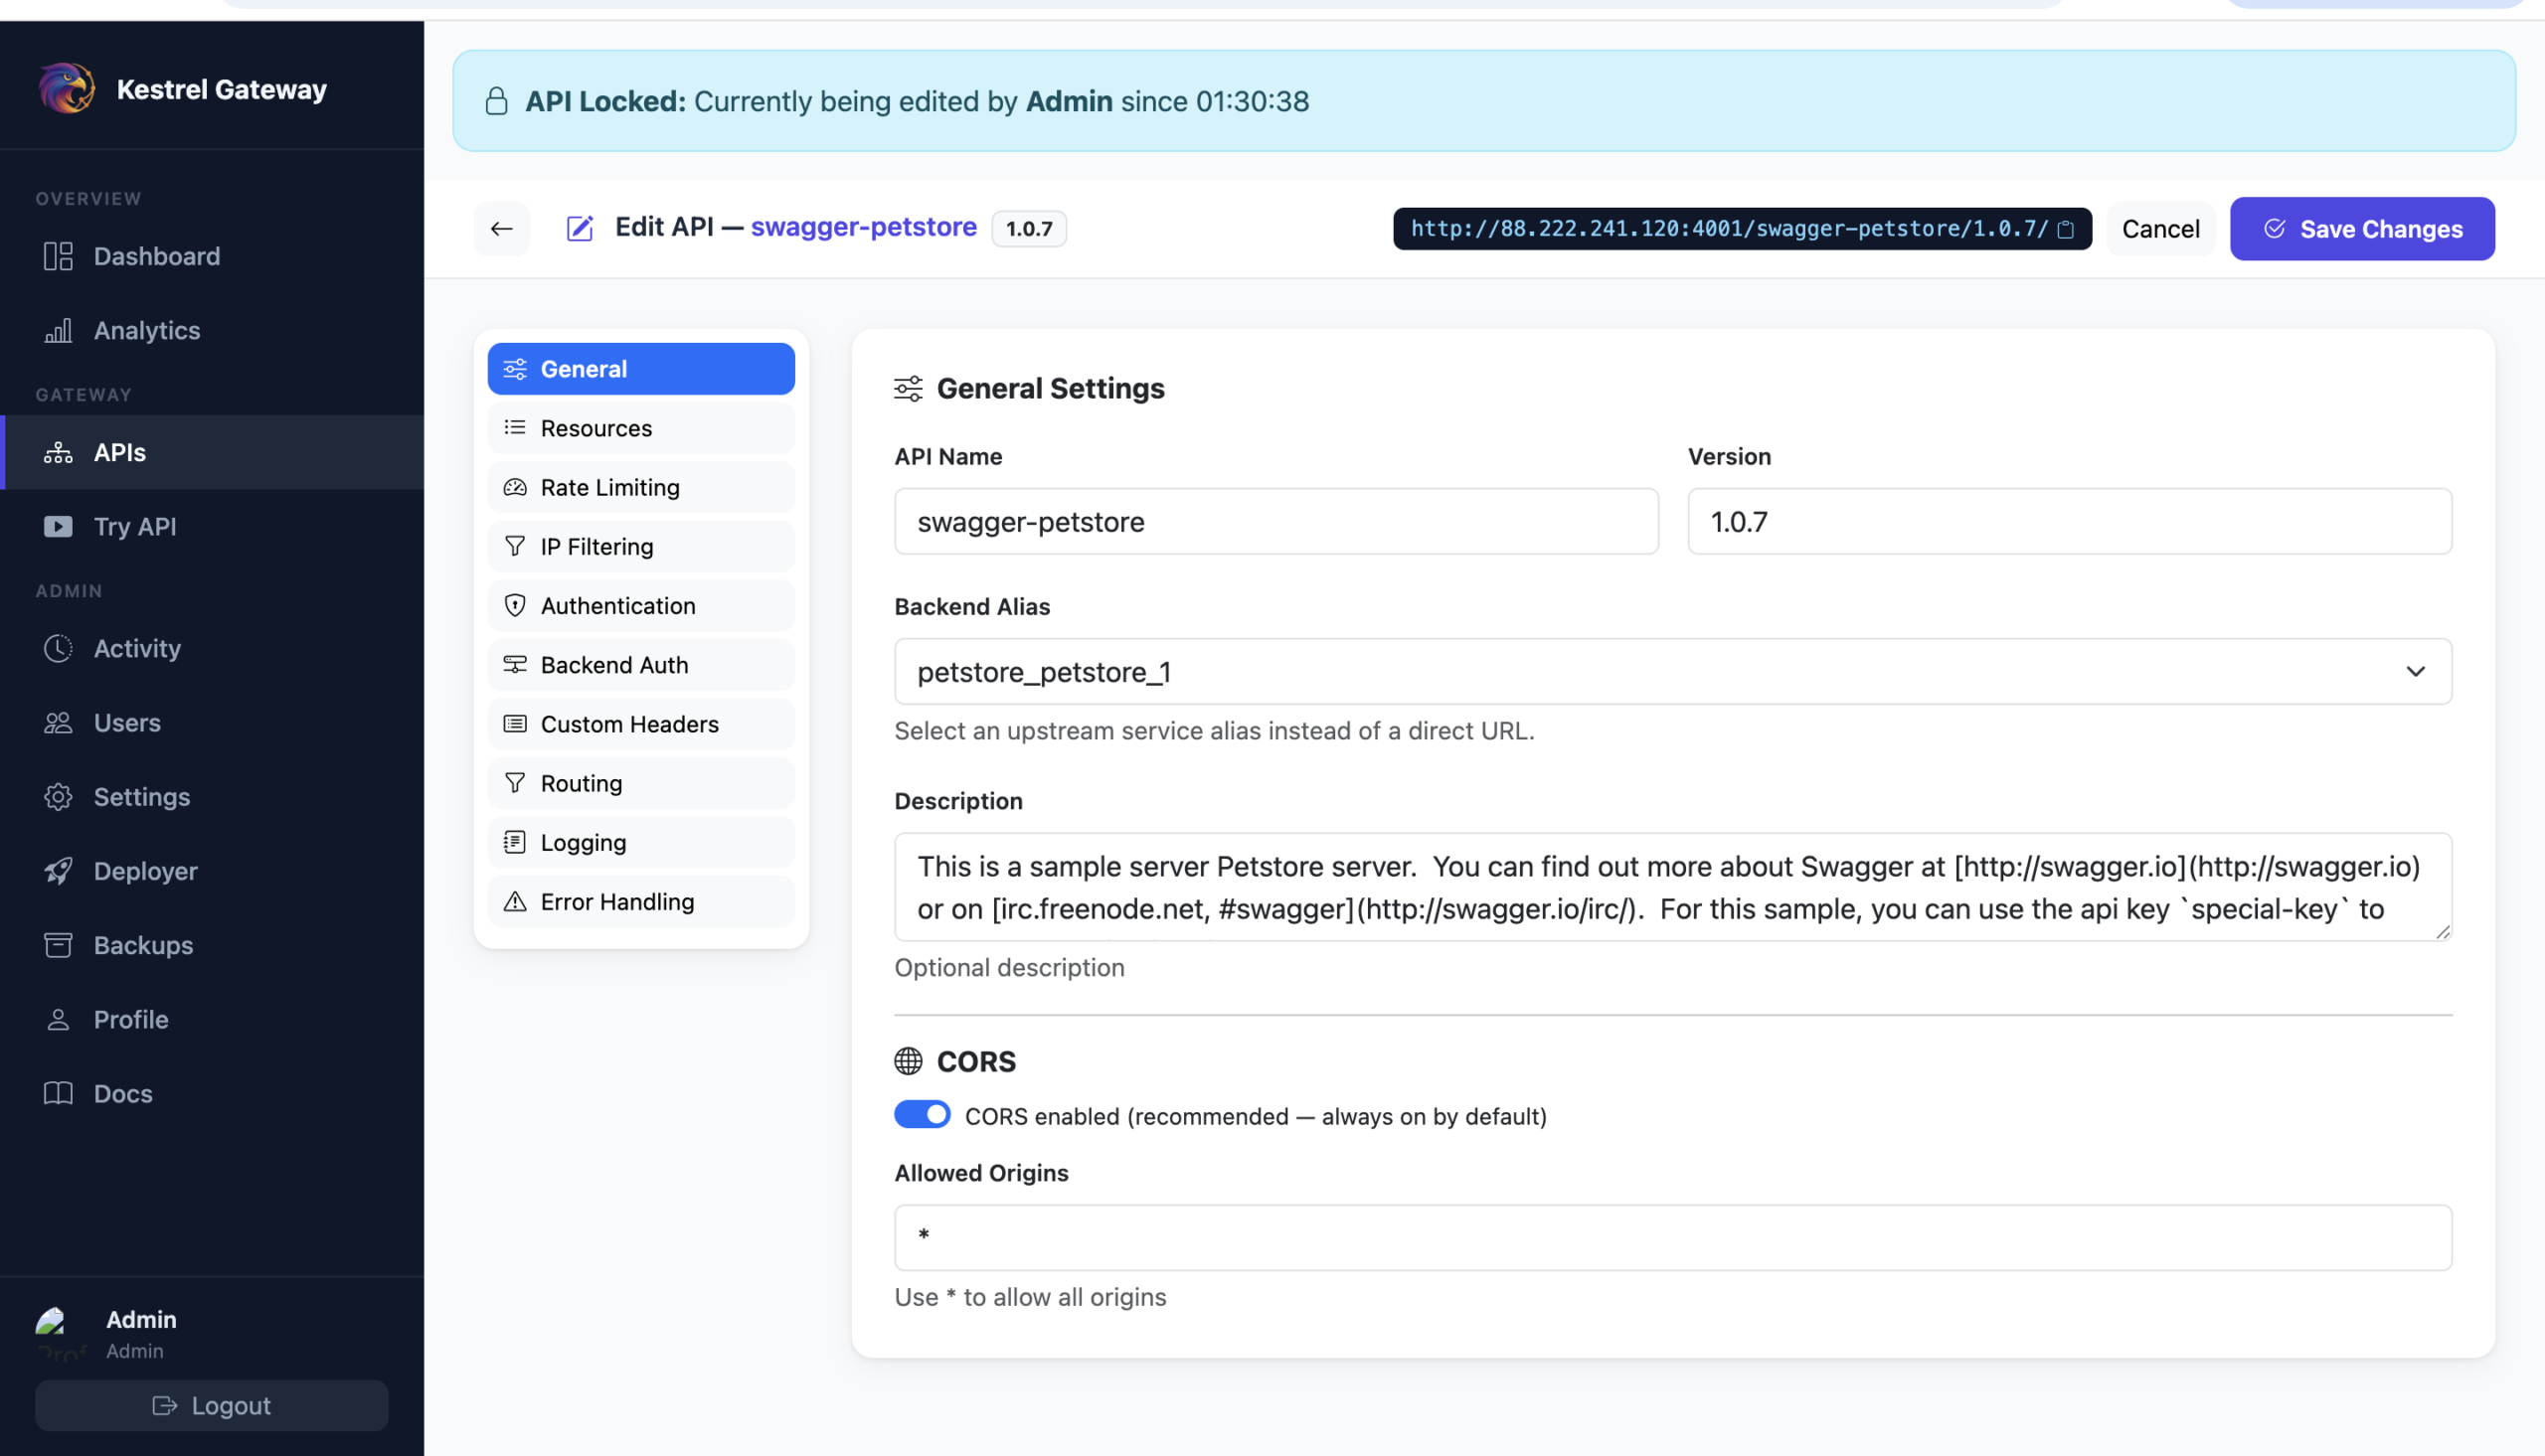
Create, edit, enable, disable, and organize API definitions from a browser-based portal. Each API can have a name, version, context path, backend mapping, resources, methods, policy references, headers, logging controls, and custom error responses.
2. Backend Aliases
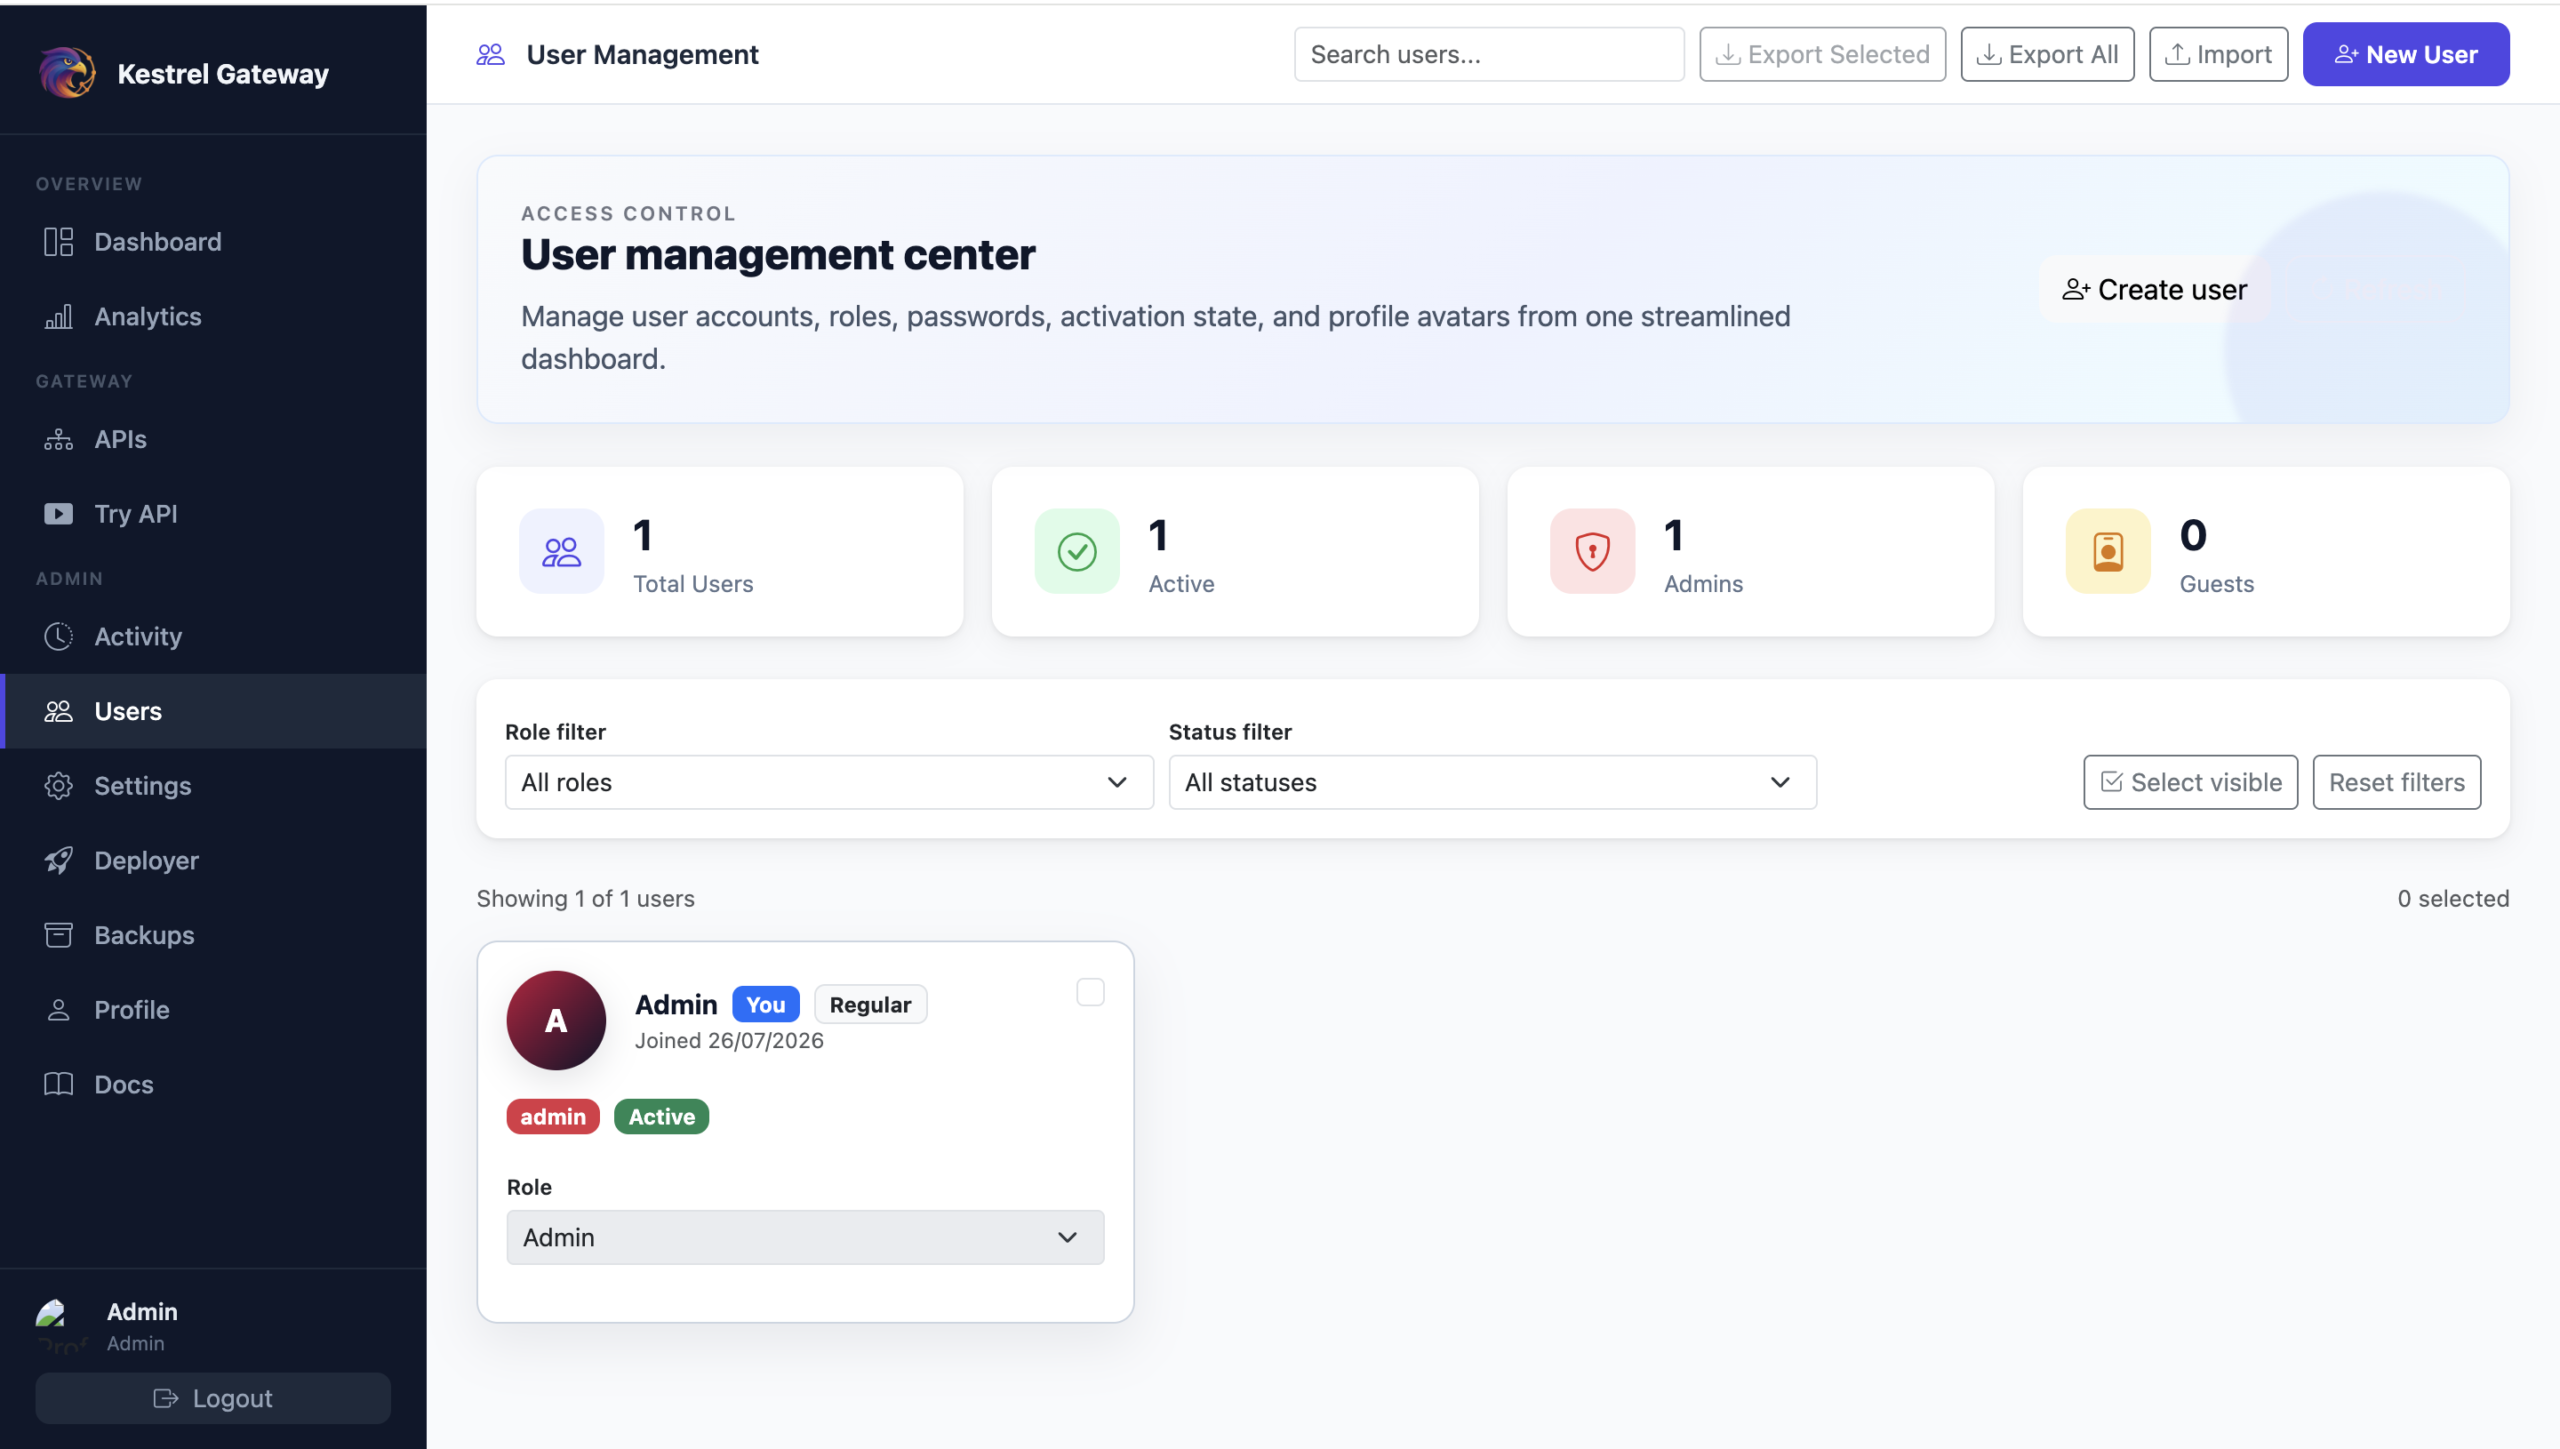
Store backend destinations as reusable aliases instead of repeating service URLs throughout API definitions. An alias separates the gateway configuration from the physical location of the upstream service, making later environment or service-location changes easier to manage.
3. Consumer Authentication Aliases
Define reusable rules for authenticating callers. Supported consumer authentication configurations include Basic authentication, API keys, and JWT validation using a public key or JWKS, including issuer, audience, algorithm, and custom-claim options where applicable.
4. Backend Authentication
Configure credentials the gateway can use when it calls an upstream service. This separates consumer-facing authentication from backend-facing authentication and avoids forcing public clients to understand internal security arrangements.
5. Resource and Method Controls
Define which resource paths and HTTP methods are exposed. The runtime evaluates the configured route and method before forwarding traffic. Parameterized and wildcard resource patterns can be used for APIs that expose dynamic paths.
6. Header-Based Conditional Routing
Route requests according to header conditions. Rules can be grouped with AND/OR logic and matched with supported operators, allowing use cases such as tenant routing, regional routing, client-version routing, controlled migrations, and feature-specific upstream selection.
7. Rate Limiting
Apply request limits at API, resource, or consumer level using second, minute, or hour windows. This helps prevent a single integration from overwhelming an upstream service and gives teams a central place to define traffic policy.
8. IP Filtering
Create reusable allow-list aliases with individual IP addresses, CIDR blocks, or IP ranges. IPv4 and IPv6 formats are supported, making it possible to restrict sensitive routes to known networks before traffic reaches the backend.
9. Header Management and Custom Errors
Add configured headers to proxied requests and return controlled error payloads for gateway failures. This helps produce a more consistent contract for API consumers, even when backend services have different behaviors.
10. Logging, Activity, and Analytics
Use gateway logging controls, API activity records, and analytics views to understand request behavior and administrative changes. Central visibility makes troubleshooting easier than collecting information independently from every backend.
11. OpenAPI and Swagger Import
Import an OpenAPI or Swagger definition from JSON/YAML content, an uploaded file, or a URL. This accelerates initial API setup and reduces the amount of route information that must be entered manually.
12. Built-In Developer Utilities
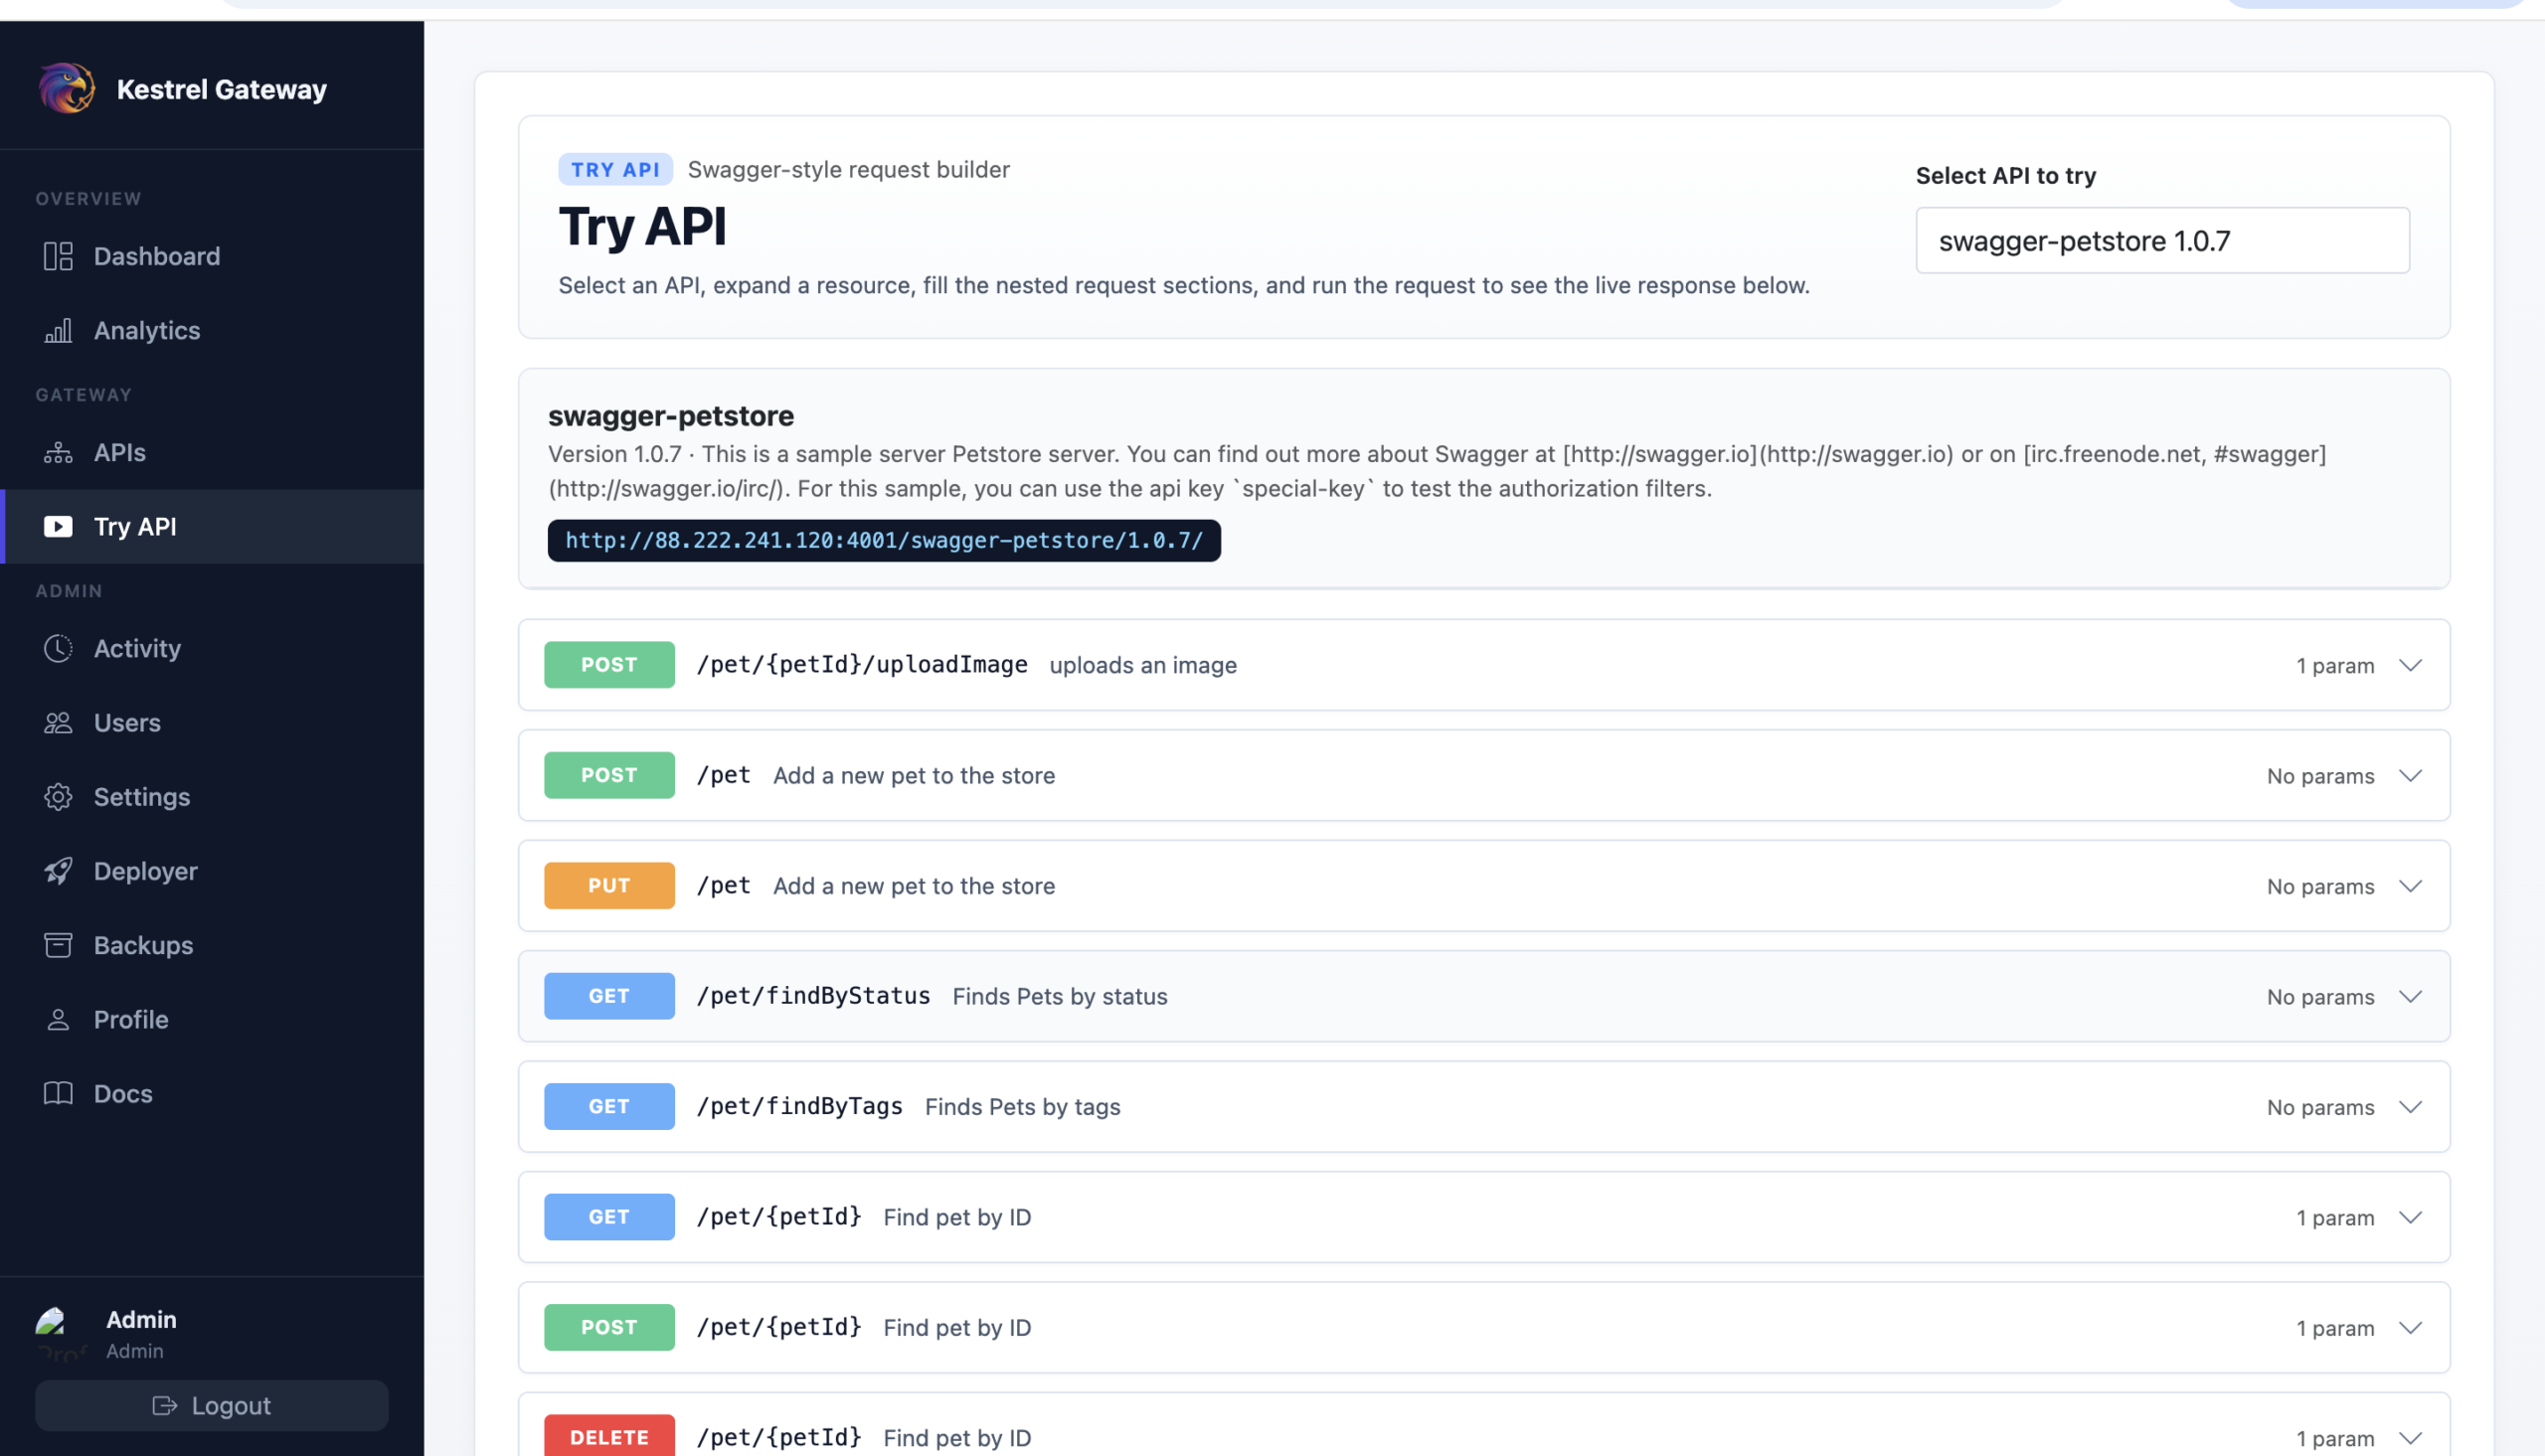
Inspect generated gateway URLs, try an API from the interface, generate cURL examples, and export a Postman collection. These tools shorten the path from configuration to verification and make it easier to share a working request with another developer.
13. Import, Export, Backup, and Restore
Move configuration between environments, export API definitions, and create or restore backups. This supports repeatable development workflows and provides a safer way to transfer gateway settings between local, test, and controlled deployment environments.
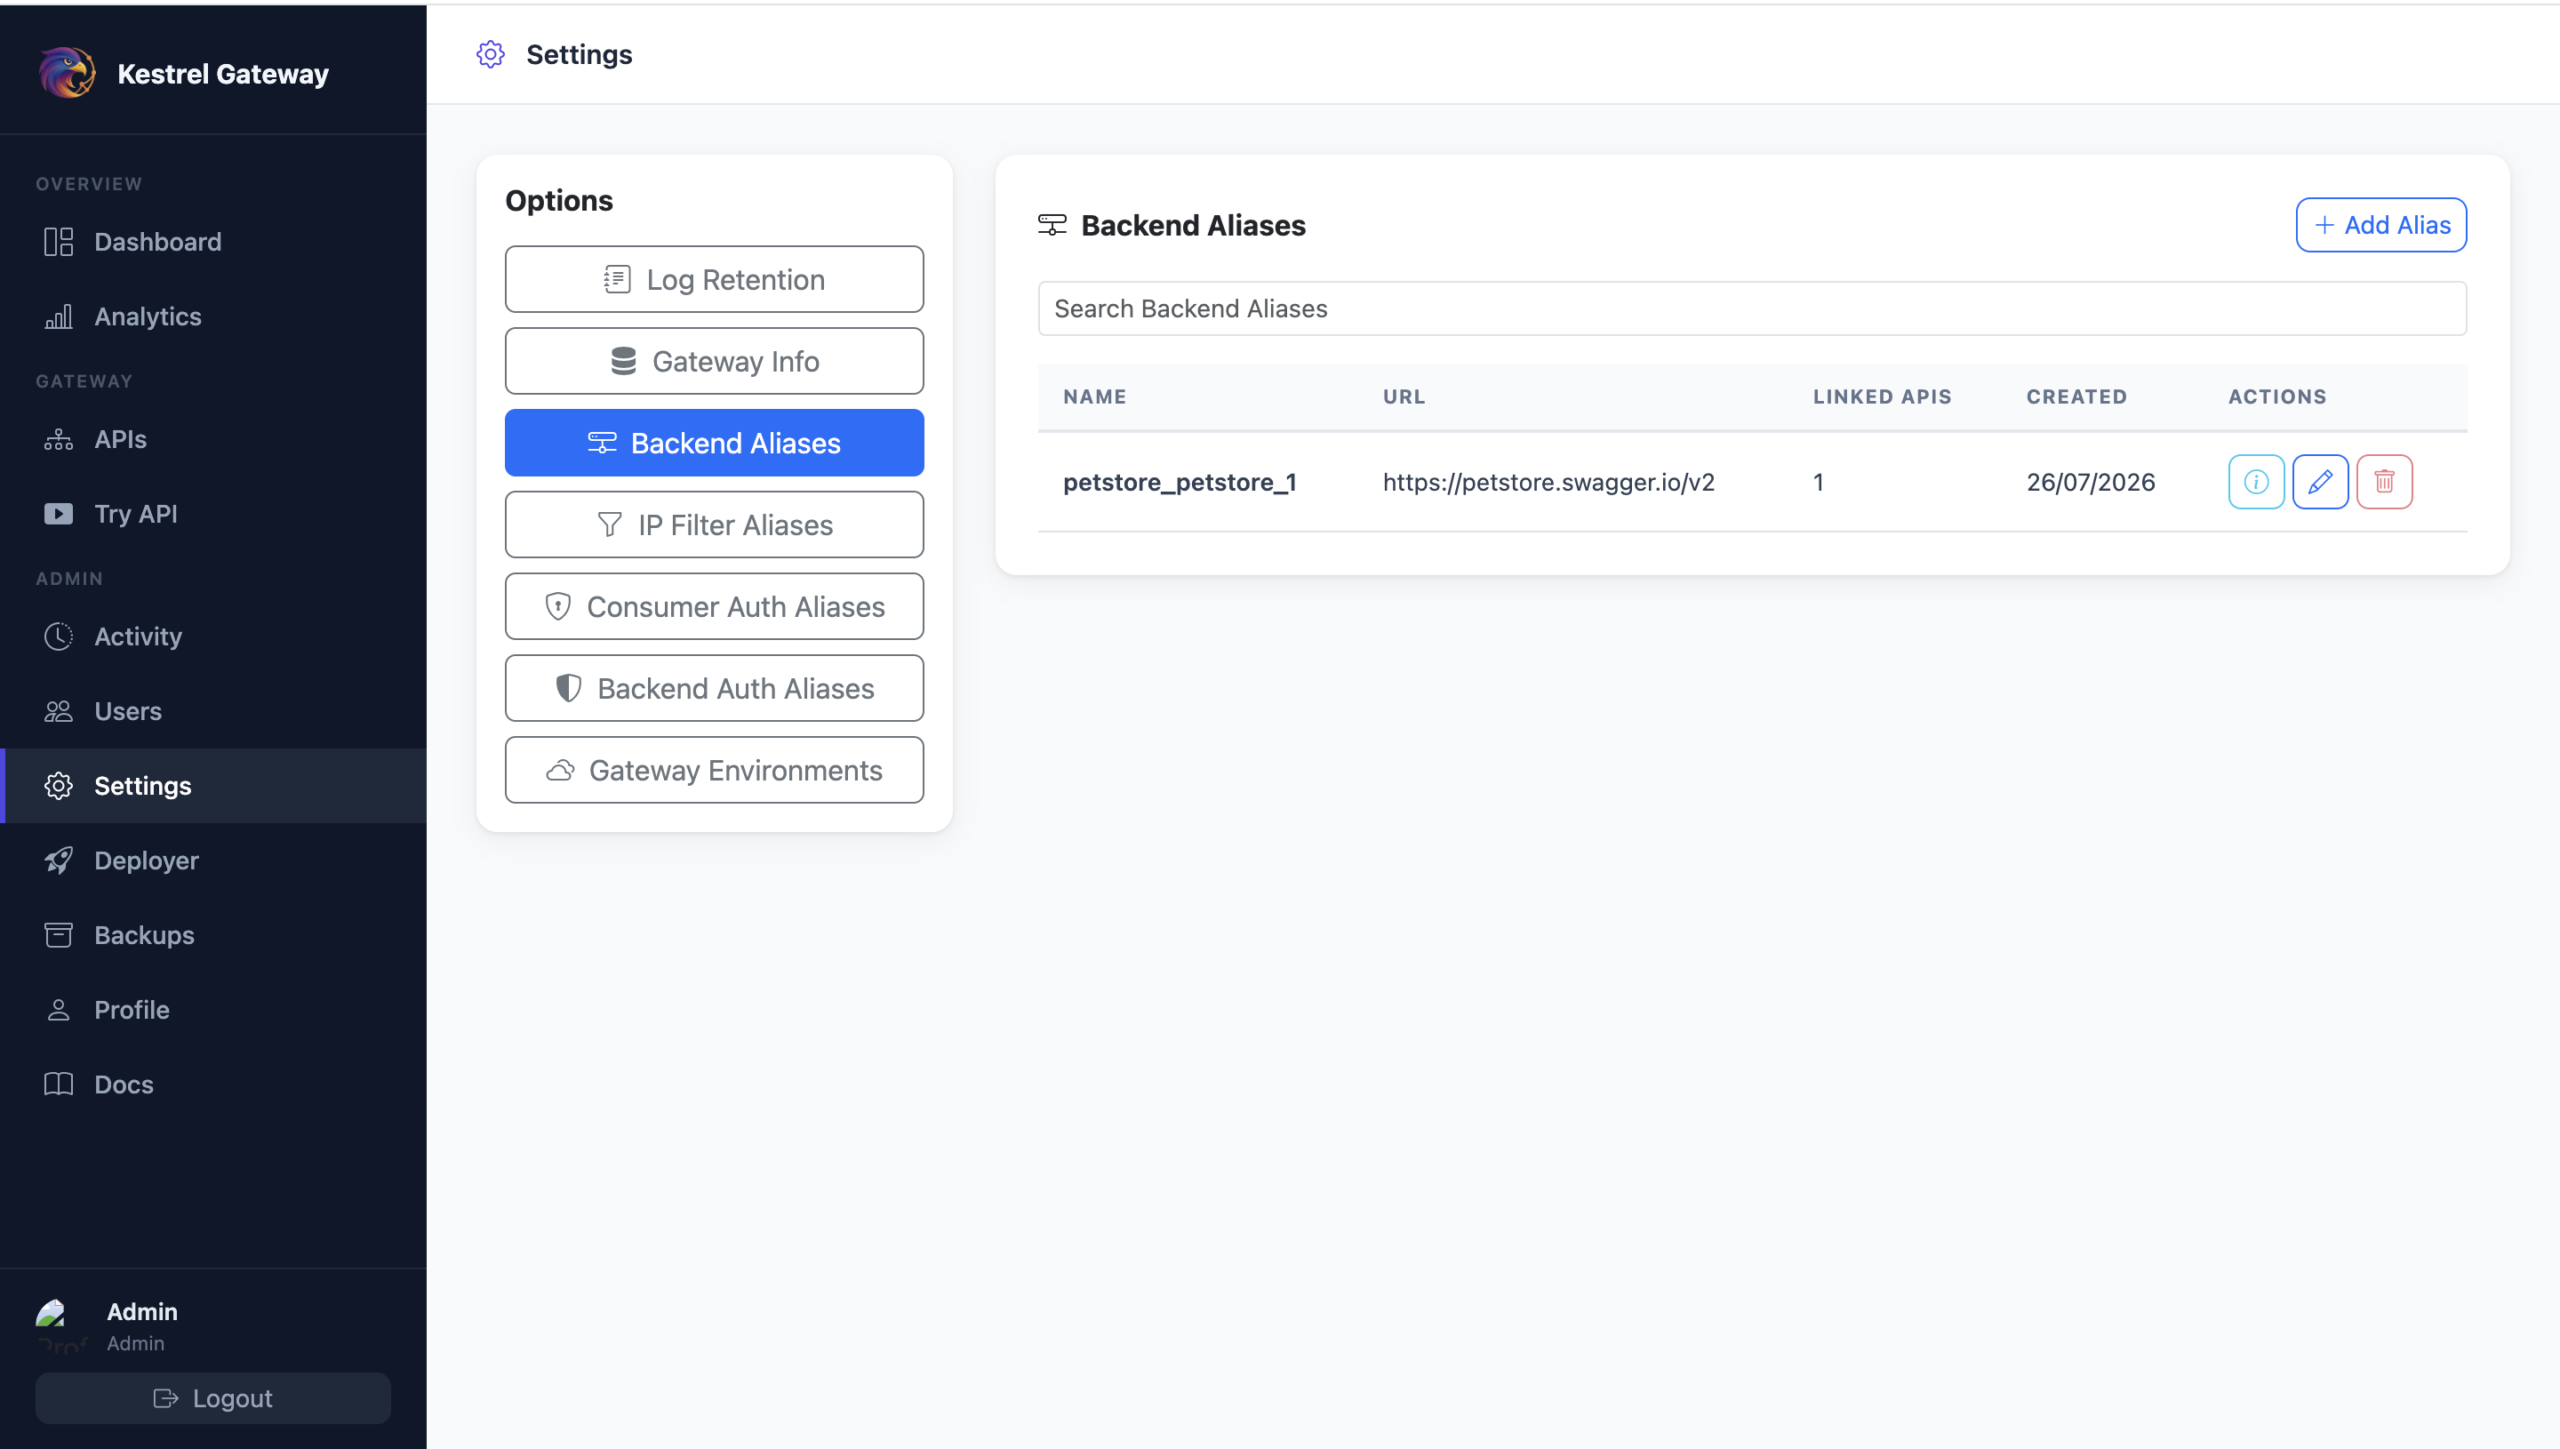
14. User and Role Management
Manage portal users and roles, protect configuration changes, and use edit-locking behavior to reduce conflicting updates. APIs can also be enabled or disabled without deleting their definitions.
Important: Configure Aliases Before Creating an API
Before creating an API, open the Settings page and define the Backend Aliases and Consumer Auth Aliases that the API will use.
These aliases are required during API configuration. If they have not been created first, the required backend destination and consumer authentication policy will not be available for selection when you configure the API.
- Open Settings → Backend Aliases. Create an alias for the upstream service and enter its reachable backend URL.
- Open Settings → Consumer Auth Aliases. Create the consumer authentication rule that callers will use, such as Basic, API key, or JWT authentication.
- Configure other reusable aliases if needed. Add a Backend Auth Alias for upstream credentials and an IP Filter Alias for network restrictions.
- Only then create the API. Select the prepared aliases while completing the API definition, resources, methods, headers, rate limits, and other policies.
Keeping aliases separate from API definitions makes the configuration reusable. For example, multiple APIs can target the same backend alias, and multiple APIs can use the same consumer authentication policy. A later backend URL or authentication change can then be managed through the appropriate alias instead of being repeated manually across every API.
Recommended API Configuration Workflow
- Confirm backend reachability. The gateway container must be able to resolve and connect to the upstream URL. Remember that
localhostinside the container refers to the container itself, not the Docker host. - Create the Backend Alias. Give the upstream destination a clear environment-aware name.
- Create the Consumer Auth Alias. Decide how callers prove their identity and configure that policy.
- Create optional supporting aliases. Add backend authentication and IP filtering when the API requires them.
- Create the API definition. Set the API name, version, context, selected aliases, resource paths, and allowed methods.
- Add traffic and routing behavior. Configure rate limits, conditional header routing, custom headers, logging, and custom error responses.
- Enable and test the API. Use the Try API view or a generated cURL request against port 4001.
- Review activity and analytics. Confirm that requests are reaching the intended backend and that rejected requests match the configured policy.
- Export or back up the configuration. Preserve a known working definition before making significant changes or moving to another environment.
Runtime Request Flow
API Consumer → Gateway Route → Consumer Authentication → IP/Rate/Method Rules → Conditional Routing → Backend Authentication → Backend Service → ResponseThe gateway rejects a request when it does not match the configured API, resource, method, authentication, IP, or traffic policy. Accepted requests are forwarded to the selected backend, and the resulting response is returned to the consumer.
Install Version 1.1.6 Locally with Docker
The published image supports both linux/amd64 and linux/arm64. The following setup pins version v1.1.6 so that the same tested version is used each time.
Prerequisites
- Docker Engine with the Docker Compose plugin
- Free host ports 4000 and 4001, or alternative ports of your choice
- A server IP address or domain that users can reach
Step 1: Create a Project Directory
mkdir API-Gateway
cd API-Gateway
Step 2: Create the .env File
Replace the placeholder secrets and URLs before deployment. Generate long, random values for the MongoDB password and JWT secret. If a password contains reserved URL characters, version 1.1.6 safely constructs the MongoDB connection from the separate variables shown below.
APP_IMAGE=mukeshbehera76/api-gateway
APP_TAG=v1.1.6

# Published host ports
APP_PORT=4000
GATEWAY_PORT=4001

# MongoDB
MONGO_ROOT_USERNAME=root
MONGO_ROOT_PASSWORD=REPLACE_WITH_A_STRONG_MONGODB_PASSWORD
MONGO_DATABASE=api_gateway

# Application security
JWT_SECRET=REPLACE_WITH_A_LONG_RANDOM_JWT_SECRET

# Replace YOUR_SERVER_IP with your server IP or domain
FRONTEND_URL=http://YOUR_SERVER_IP:4000
PUBLIC_GATEWAY_URL=http://YOUR_SERVER_IP:4001

# Keep false while the UI is served over plain HTTP.
# Enable only after the UI is consistently served through HTTPS.
ENABLE_CROSS_ORIGIN_ISOLATION=false.env values, JWT secret, database password, API keys, or authentication snapshots. If a secret has already been shared, rotate it before using the deployment.Step 3: Create docker-compose.yaml
services:
  mongo:
    image: mongo:6.0
    container_name: api_gateway_mongo
    restart: unless-stopped
    environment:
      MONGO_INITDB_ROOT_USERNAME: ${MONGO_ROOT_USERNAME}
      MONGO_INITDB_ROOT_PASSWORD: ${MONGO_ROOT_PASSWORD}
      MONGO_INITDB_DATABASE: ${MONGO_DATABASE}
    volumes:
      - mongo_data:/data/db
    healthcheck:
      test:
        - CMD
        - mongosh
        - --quiet
        - --eval
        - db.adminCommand('ping').ok
      interval: 10s
      timeout: 5s
      retries: 10

  app:
    image: ${APP_IMAGE}:${APP_TAG}
    container_name: api_gateway_app
    restart: unless-stopped
    depends_on:
      mongo:
        condition: service_healthy
    ports:
      - "${APP_PORT}:4000"
      - "${GATEWAY_PORT}:4001"
    environment:
      NODE_ENV: production
      PORT: 4000
      GATEWAY_PORT: 4001

      FRONTEND_URL: ${FRONTEND_URL}
      PUBLIC_API_URL: /api
      PUBLIC_GATEWAY_URL: ${PUBLIC_GATEWAY_URL}

      JWT_SECRET: ${JWT_SECRET}
      ENABLE_CROSS_ORIGIN_ISOLATION: ${ENABLE_CROSS_ORIGIN_ISOLATION}

      MONGO_HOST: mongo
      MONGO_PORT: 27017
      MONGO_DATABASE: ${MONGO_DATABASE}
      MONGO_USERNAME: ${MONGO_ROOT_USERNAME}
      MONGO_PASSWORD: ${MONGO_ROOT_PASSWORD}
      MONGO_AUTH_SOURCE: admin

volumes:
  mongo_data:
The MongoDB health check and conditional dependency are important. They ensure the application starts only after MongoDB is ready to accept connections. Version 1.1.6 also waits for its database connection before opening the management and gateway listeners.
Step 4: Validate and Start the Containers
docker compose config
docker compose pull
docker compose up -d
docker compose ps
Both containers should become healthy or running. If the application restarts or the login request fails, inspect the logs:
docker compose logs --tail=200 mongo
docker compose logs --tail=200 app
Existing MongoDB volume: MongoDB initialization variables are applied only when the data directory is empty. If a named volume was previously initialized with different credentials, changing the .env file does not automatically change that stored database user.
For a fresh installation with no data to preserve, remove the Compose stack and its volume with docker compose down -v, then start it again. This permanently deletes the database in that volume, so back up required data first.
Step 5: Open the Portal
Open http://YOUR_SERVER_IP:4000 in a browser. The initial demonstration login is:
| Username | guest |
|---|---|
| Password | guest |
After the first login, create a new administrator account, verify that the new account works, and remove or disable the default guest account.
Create and Test Your First API
- Sign in to the management portal on port 4000.
- Go to Settings → Backend Aliases and create the backend destination.
- Go to Settings → Consumer Auth Aliases and define how consumers will authenticate.
- Create any required Backend Auth Alias or IP Filter Alias.
- Open the API area and create a new API using the aliases you prepared.
- Add the permitted resources and HTTP methods.
- Configure rate limiting, headers, conditional routing, logging, and error behavior as required.
- Enable the API and call the generated URL on gateway port 4001.
- Confirm the result with Try API, cURL, logs, activity records, and analytics.
Example route shape
curl http://YOUR_SERVER_IP:4001/<api-name>/<version>/<resource>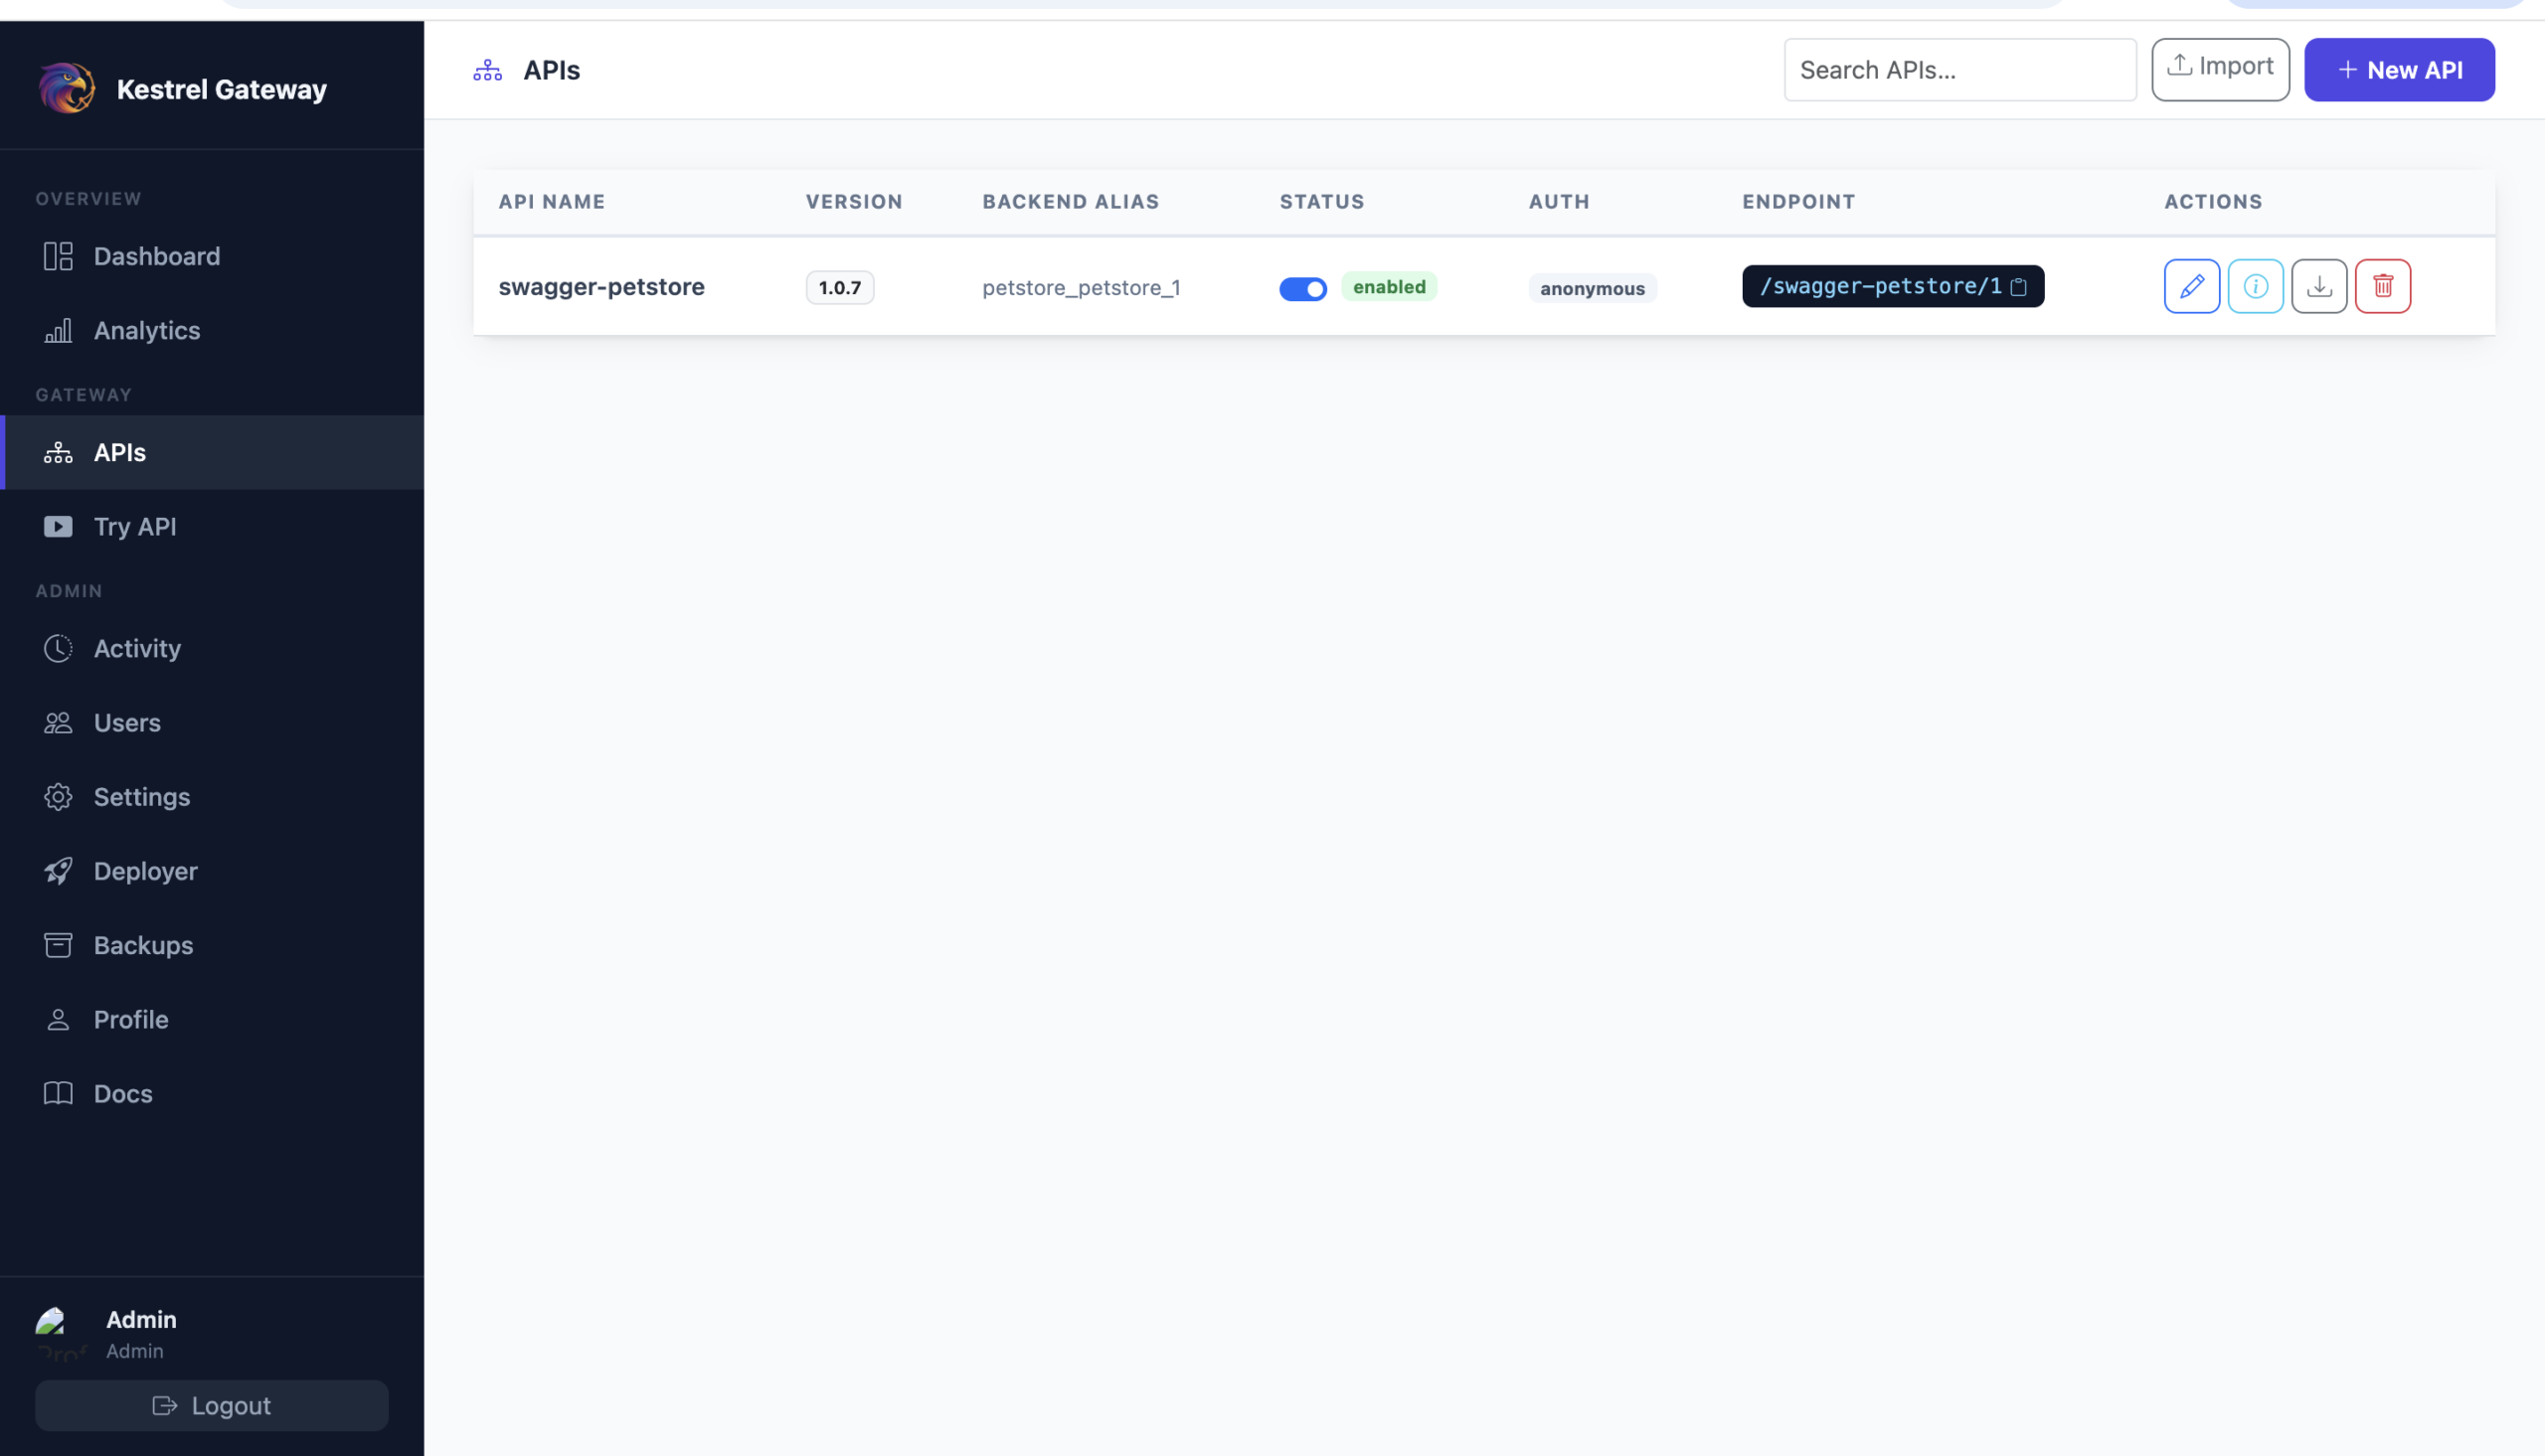
How This Project Helps Developers and Teams
- Backend developers can keep gateway concerns out of business-service code and expose services through a consistent route.
- Frontend and integration developers can work with a stable public endpoint and a predictable authentication contract.
- Platform teams can reuse aliases, policies, exports, and backups instead of duplicating configuration for every API.
- Test teams can use generated cURL requests, Postman collections, and the built-in request tool to reproduce calls.
- Small teams and learners can explore core gateway concepts without first operating a large distributed gateway platform.
Because the management plane and runtime are packaged together, the project is convenient for learning, local development, proof-of-concept work, internal APIs, and environments where a small operational footprint matters. Production suitability should still be evaluated against your availability, security, scale, persistence, monitoring, and compliance requirements.
Current Project Status and Issue Reporting
Kestrel Gateway is an actively evolving API gateway solution and may contain issues that require fixes. Test your API definitions and policies carefully before relying on them for important workloads. The documentation currently available inside the application UI is not complete; it will be expanded and completed in a future update.
Found an issue?
Send an email to mukesh.behera@harmonigate and include:
- A short description of the problem and the expected behavior
- Steps to reproduce it
- The Docker image tag and host architecture
- Relevant application or MongoDB log lines
- Screenshots or snapshots that show the issue
Before sending logs or snapshots, remove passwords, JWT secrets, API keys, authorization headers, cookies, private URLs, and personal or customer data.
Conclusion
Kestrel Gateway is an API gateway solution that provides a focused way to place routing, consumer authentication, backend authentication, rate limits, network restrictions, conditional routing, observability, testing, and API lifecycle utilities in front of backend services. It helps developers reduce duplicated infrastructure logic while giving teams a single place to understand and manage how consumers reach their APIs.
Remember the required order: first create the Backend Aliases and Consumer Auth Aliases on the Settings page, and then create the API using those aliases. That small preparation step is the foundation for a correctly configured gateway route.