Overview
File-based operations are still a key part of many integrations and MuleSoft’s File module makes working with files simple and reliable. This article gives a quick overview of how the MuleSoft File module helps in handling local file system operations.
Using the File module, you can read, write, move, delete, and list files directly from directories, making it ideal for processing flat files, batch data, and legacy system inputs. It supports common use cases like file polling, archiving processed files, and error handling through folder-based strategies.
By using the File module effectively, businesses can automate file-driven processes, reduce manual effort, and ensure smooth data flow between systems. This article helps you understand where the File module fits, what operations it supports, and how it adds value to real-world integration scenarios.
Write File in MuleSoft
- Create a Mule project and add a Mule configuration file named global-config. This file will be used to store all the configuration details related to the project.
- As we need to perform file-based operations, we need to add the File module to our project. In the Mule Palette, click on Add Modules, then search for and drag the File module into the canvas. The required dependency will be automatically added to the project.
- Create a folder in your desktop and copy it’s path.
- Open the global-config file and navigate to the Global Elements tab. Click on the Create button, search for File, select File Config, and then click OK.
- Once the pop-up opens, check the Connection checkbox, select the working directory as the folder you created in the previous step, then test the connection and click OK.

- Open global-config and add Http Listener config keeping as is everything.
- Create a new Mule configuration file and name it write-flow.xml.
- Add an HTTP Listener component and set the Path to
/writeFile. - In the HTTP Listener configuration, select the HTTP Listener Config you created earlier.
- Add a Logger component and log the payload using
#[payload]. - Add a Write operation from the File module and configure it as follows:
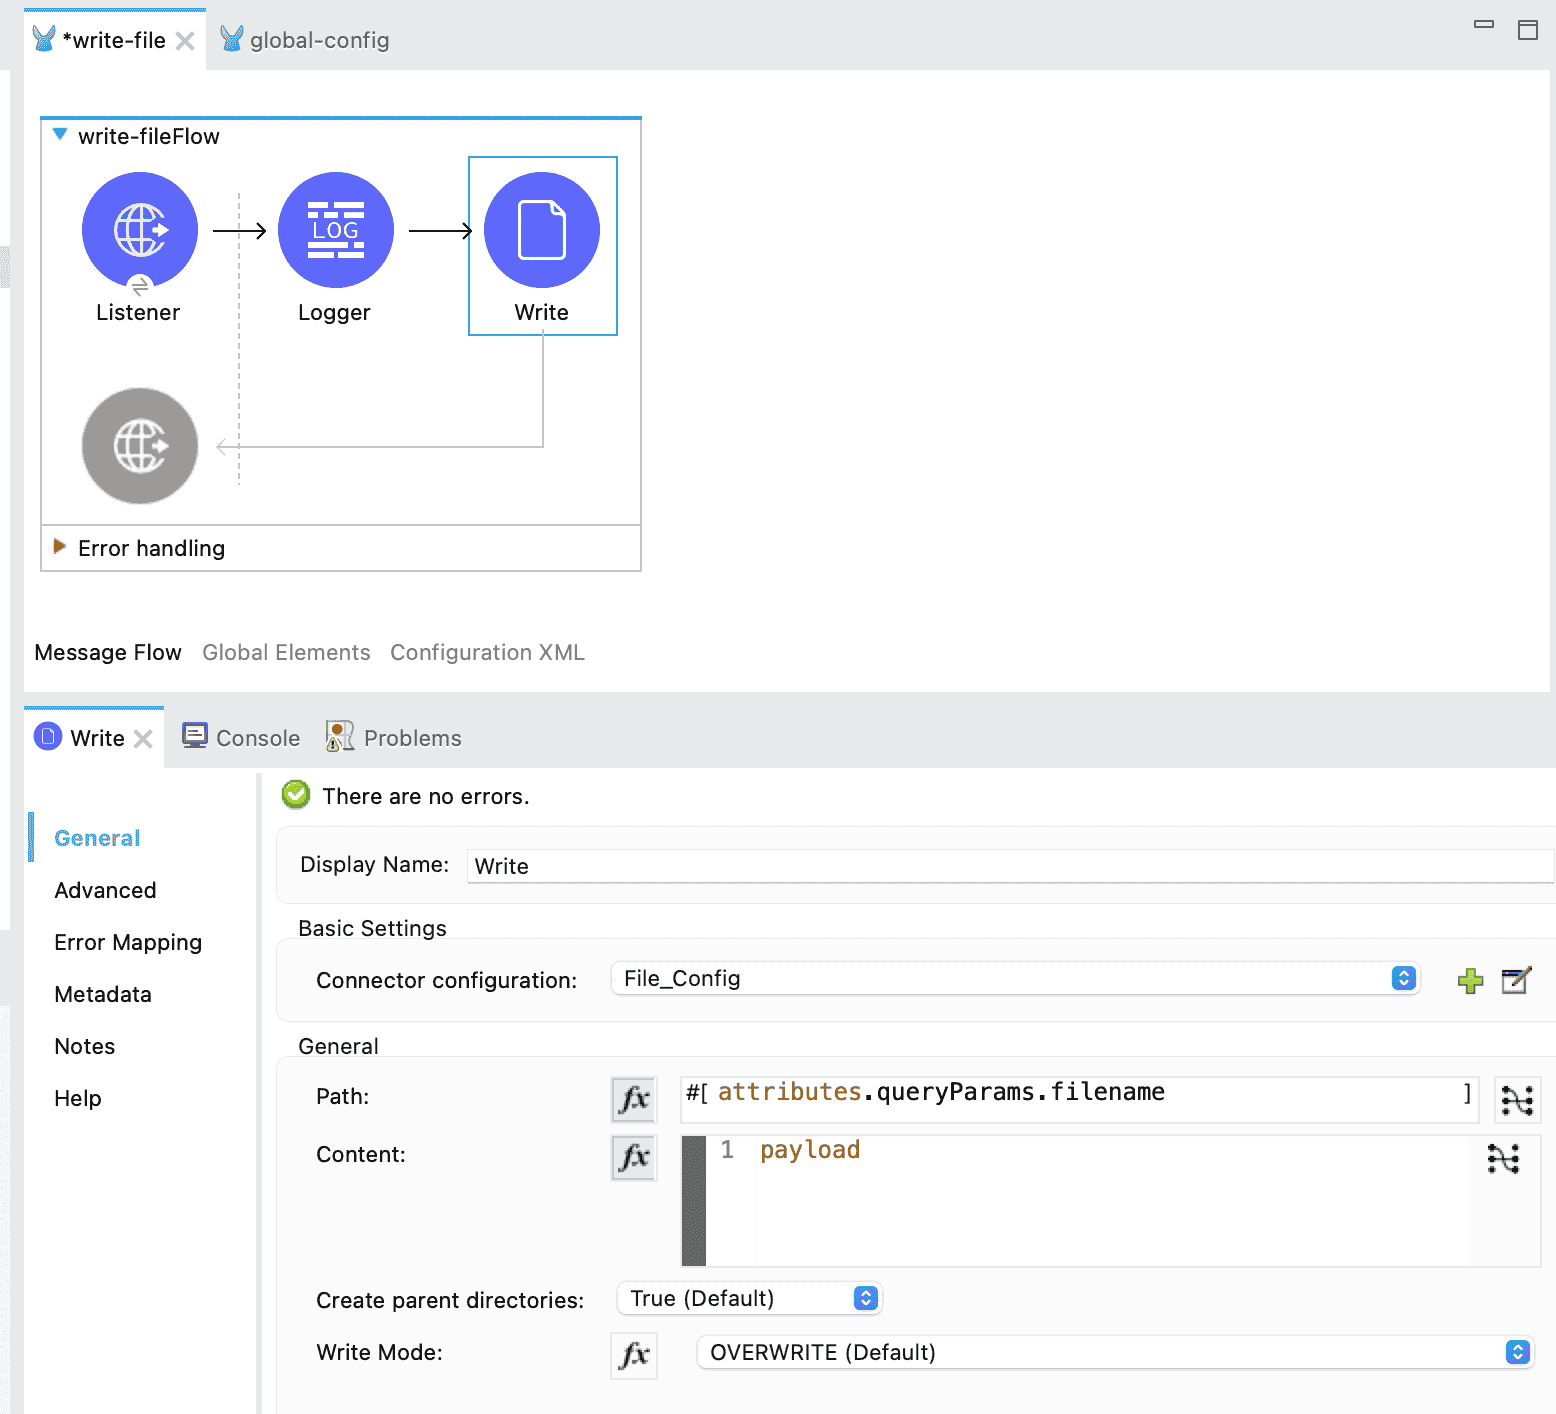
- In the connector configuration, select the File_Config you created in the global configuration.
- Set the Path to
#[attributes.queryParams.filename]so that the filename is extracted from the query parameters and the file is saved with the same name in the file system. - Keep other settings as default. The Write Mode is set to Overwrite by default, which means if a file with the same name already exists, its content will be replaced with the new content.
- Save all changes and run the Mule application.
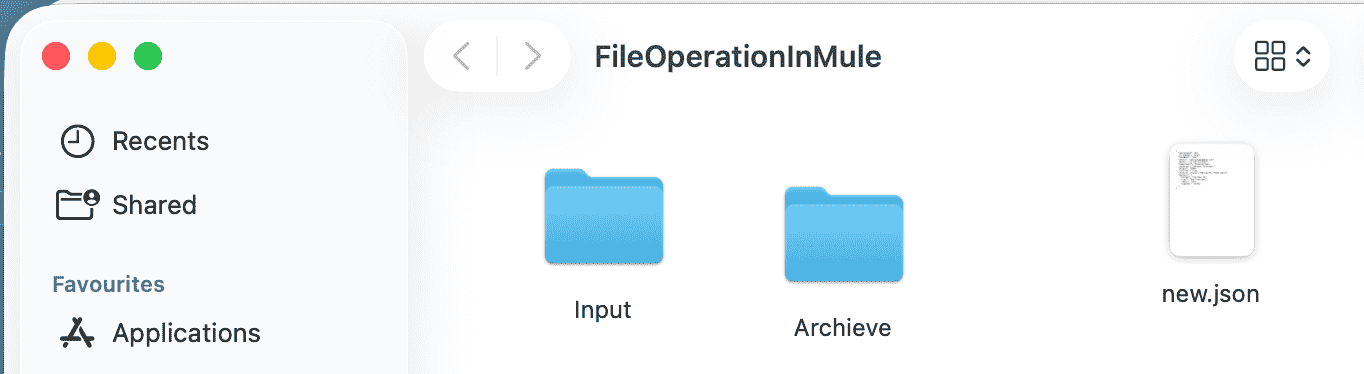
- Once the Mule application is deployed, call the endpoint from Postman by passing a filename in the query parameter and including the payload in the request body. Once the application runs successfully, you will notice that the file is created in the specified location. If you call the same endpoint again with the same filename but a different payload, the file content will be updated with the new data.Your mule flow will look like below :
Testing :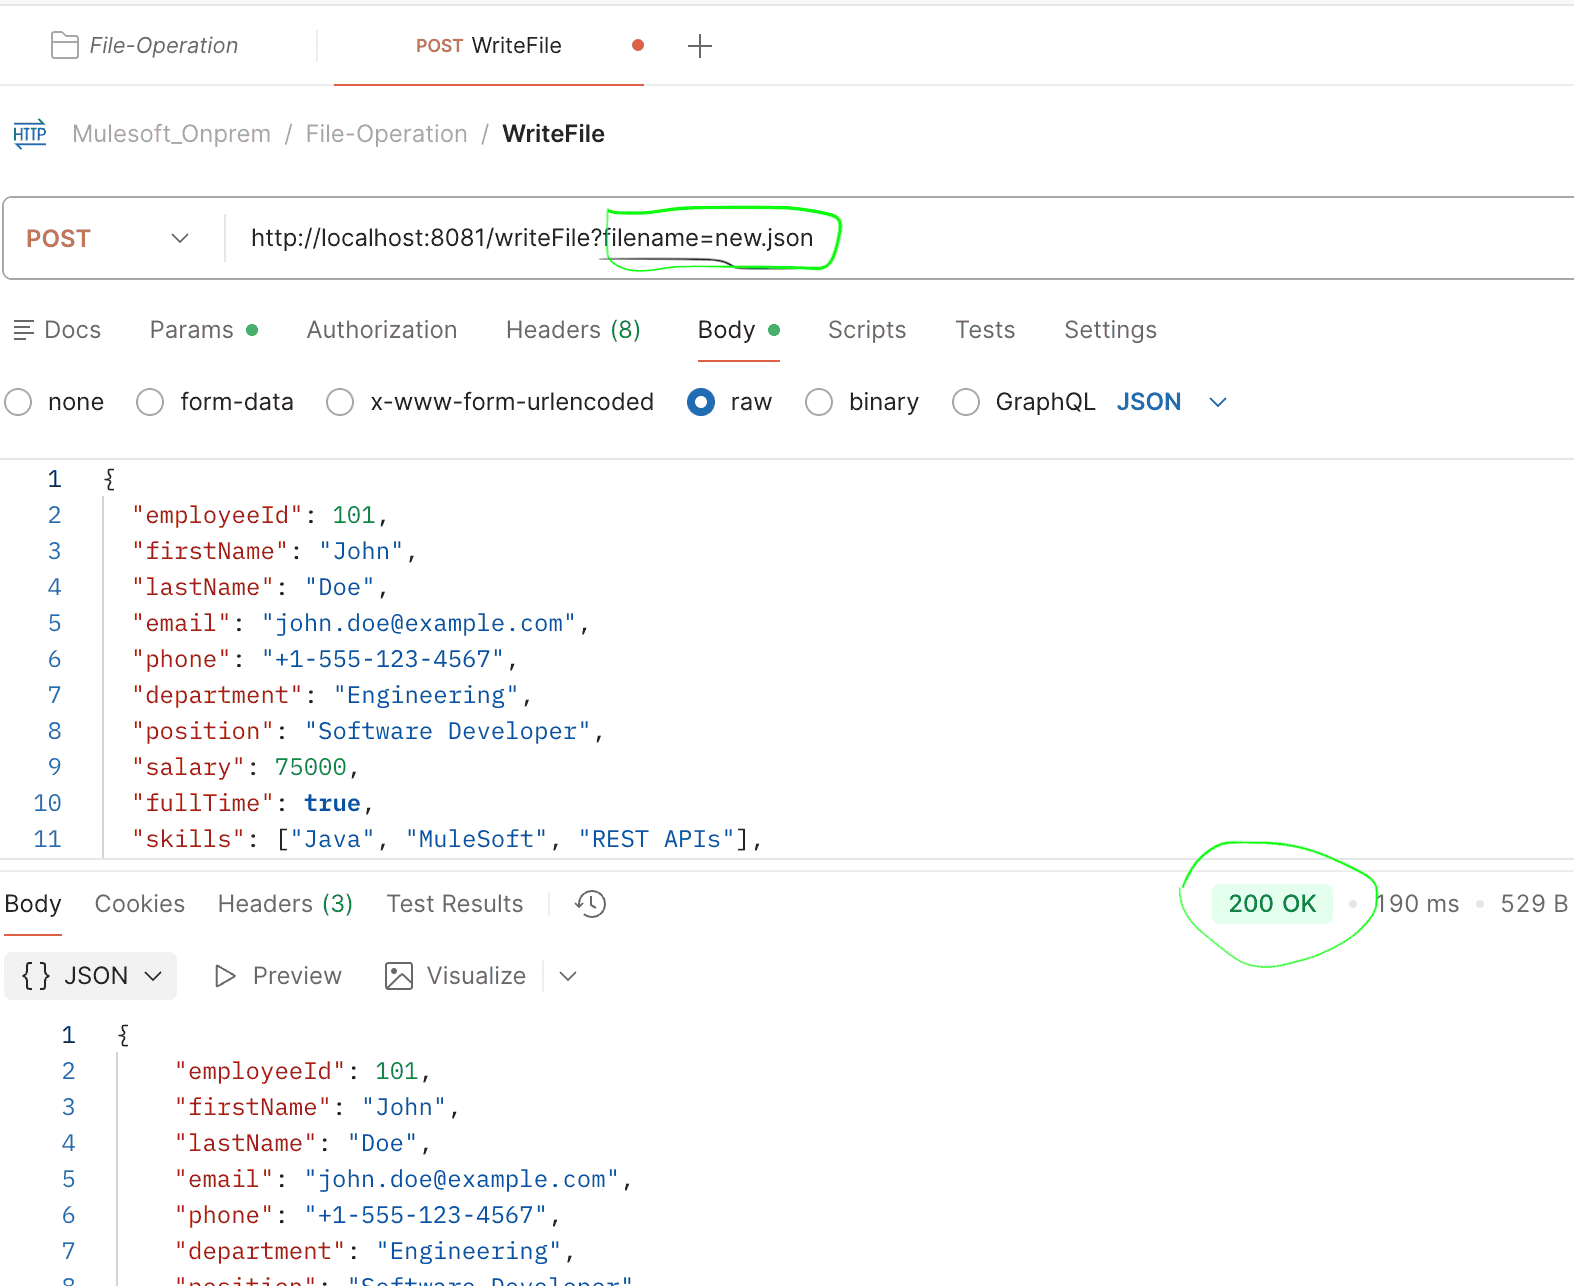
⚠️ Important Note:
- If you update the Write Mode to APPEND, then every time you call the API with the same filename, the new content will be appended to the existing file.
- If you update the Write Mode to CREATE_NEW, then calling the API with a filename that already exists will cause the flow to fail and throw an exception.
File polling In Mule
File polling in MuleSoft means automatically checking a folder for new or updated files and processing them as they arrive. It’s needed to automate file-based integrations, handle data from legacy systems, and trigger workflows without manual intervention.
- Create a new Mule configuration file and name it file-poller.xml.
- Drag and drop the On New or Updated File component onto the Mule canvas and configure it as follows:
- Connector Configuration: Select the File_Config created in the global configuration.
- Directory: Create a folder named Input in your desired location and select it here.
- Recursive: By default, this is selected. This means that if there are nested folders inside the directory, any new or updated files within them will also be picked up.
- Scheduling Strategy: Keep it as Fixed Frequency to poll files at regular intervals.
- Frequency: Set it to
2(or5) depending on how often you want to poll. - Time Unit: Select Seconds.
- Keep other settings as default.
- Add a Logger component after the listener and log the payload using
#[payload]. - Save all changes and deploy the Mule application.
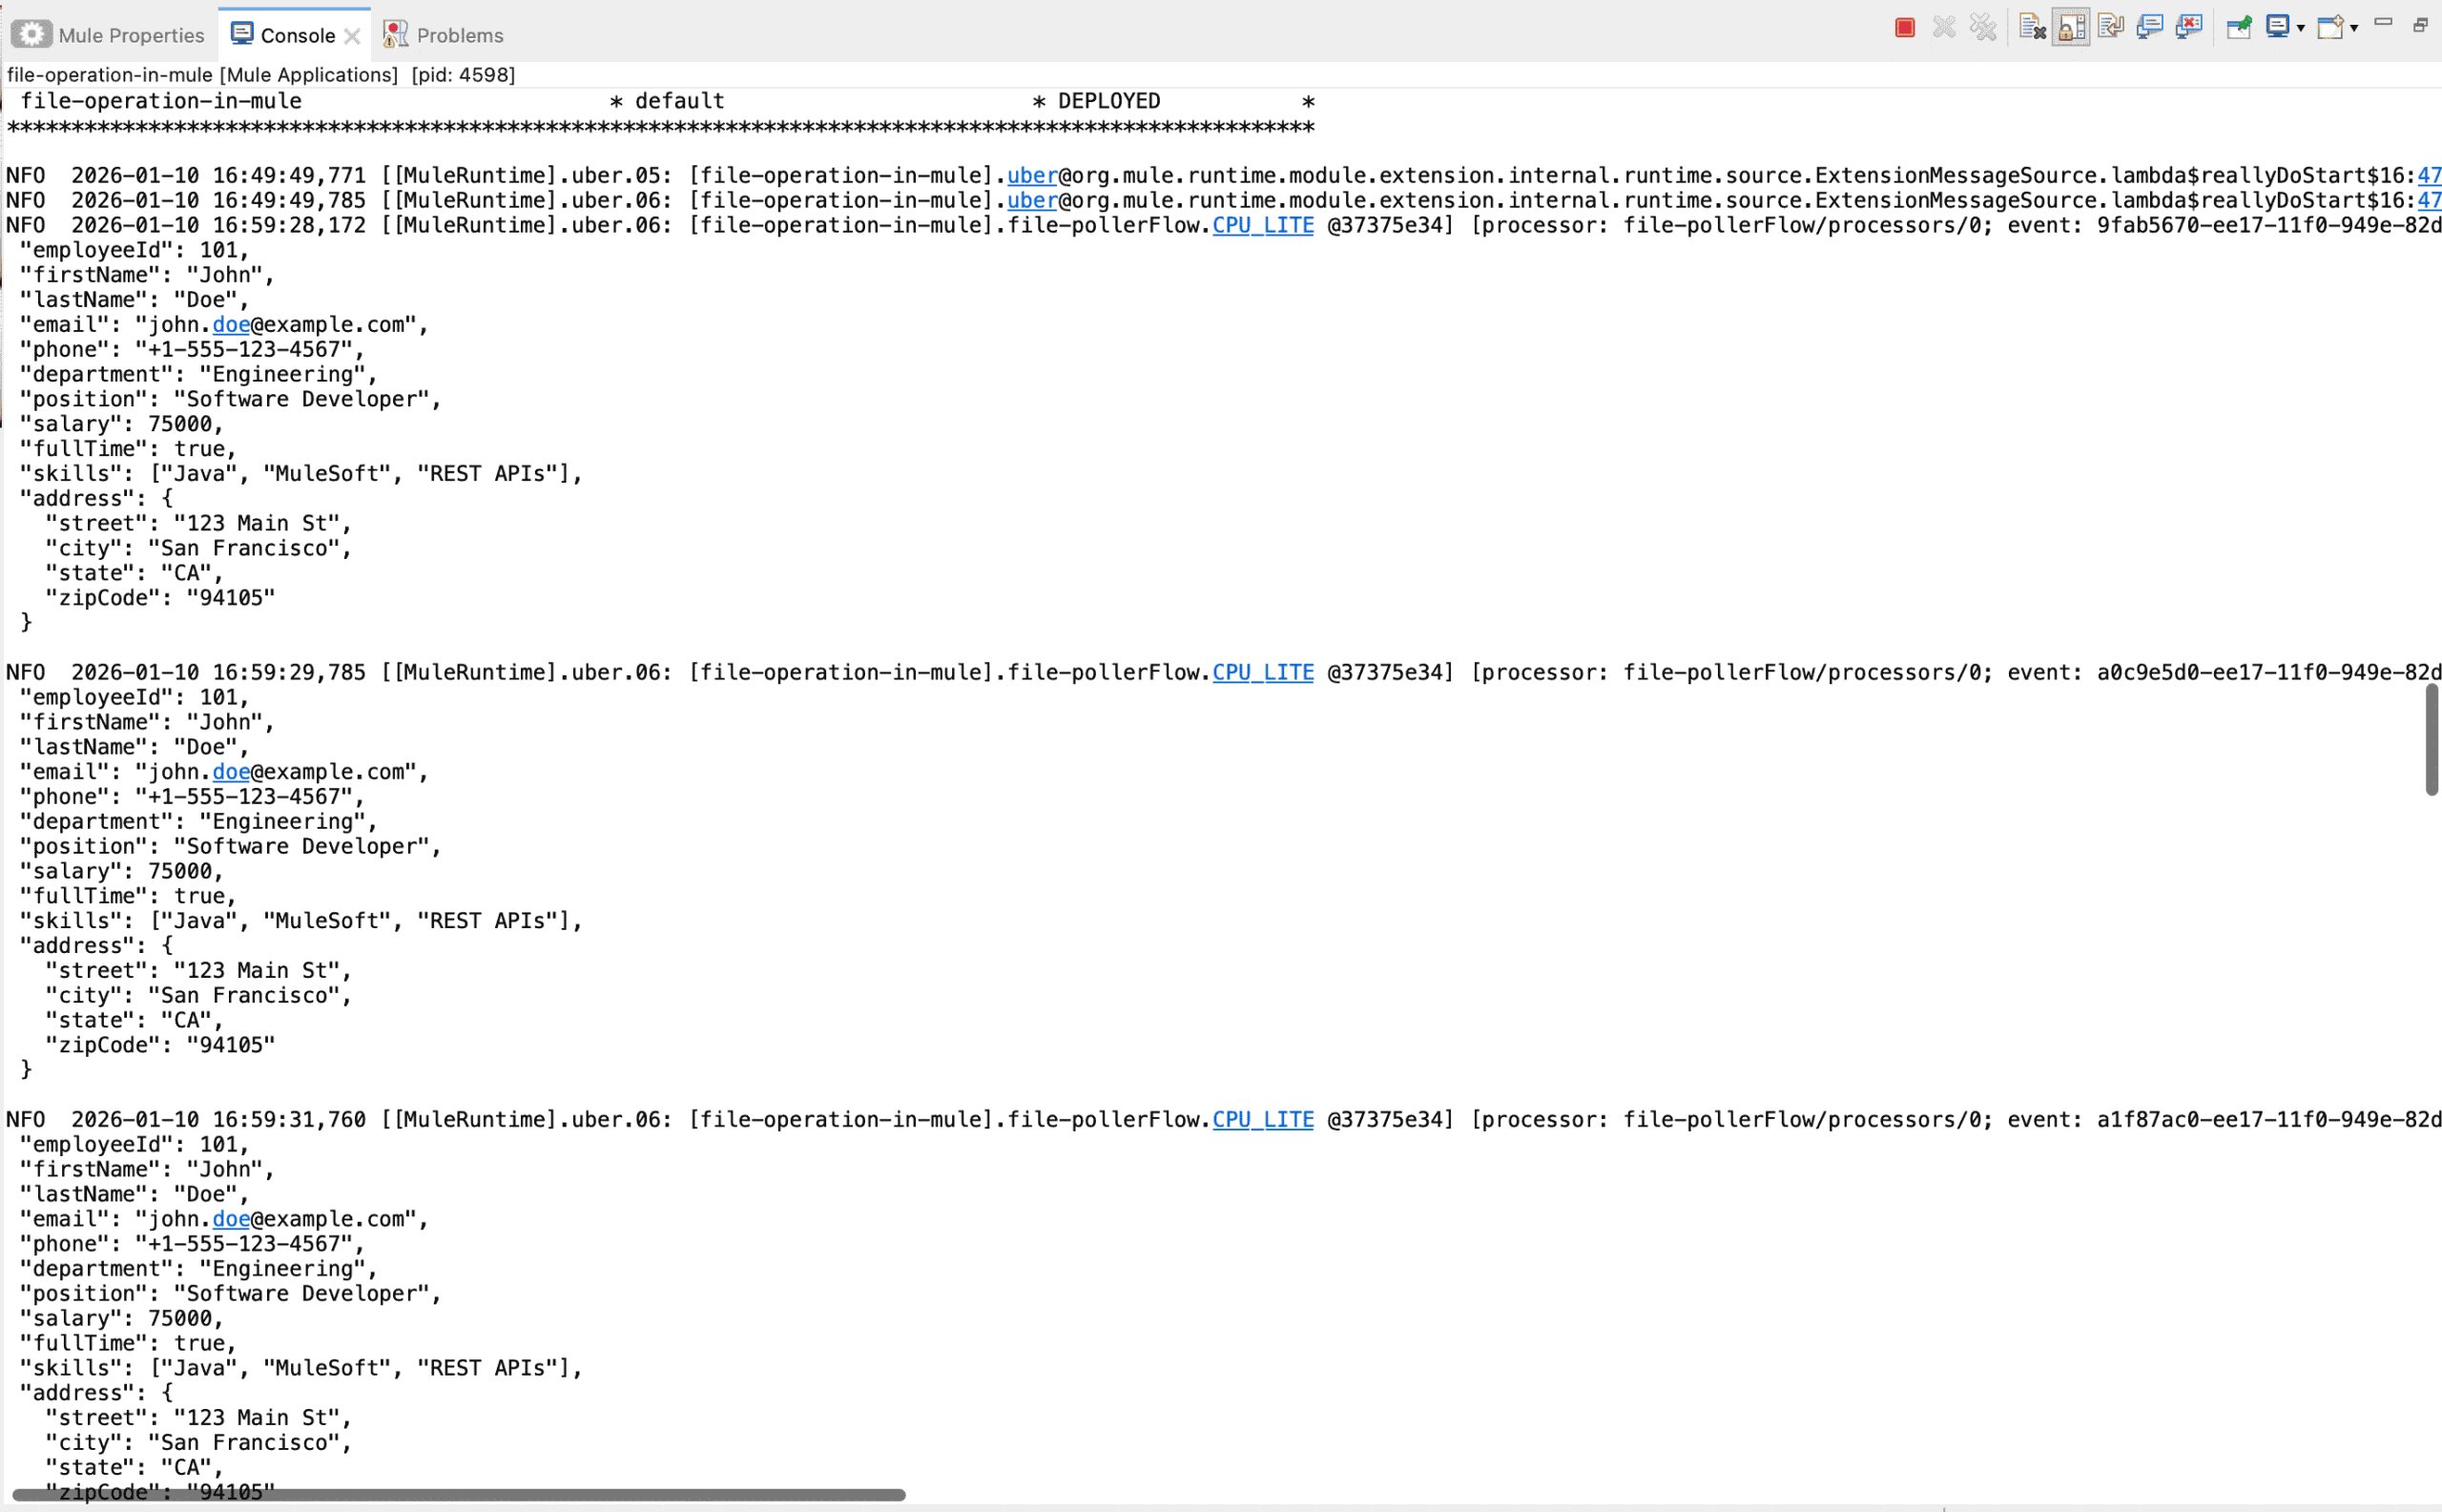
- Drop the file that was created in the Write operation into the Input directory. You will notice that the same file is picked up every 2 seconds because there is no logic in place to delete or archive the file after processing.
📌 Important Note:
- What if you want to delete the file after processing?
- Set Auto Delete to true.
- What if you have a complex schedule, like picking the file every 1st Monday of the month?
- Set the Scheduling Strategy to Cron and provide the appropriate Cron Expression.
- What if you want to pick only files with a
.csvextension?- Set the Matcher to Inline and set the Filename Pattern to
*.csv. You can explore other options as well.
- Set the Matcher to Inline and set the Filename Pattern to
- What if you want to move the file to an archive folder after processing?
- Create a new folder for processed files and select it in Move to Directory.
- Rename the file:
You can rename the file to make it unique by appending a timestamp using the following expression:attributes.fileName ++ "_" ++ (now() as String {format: "yyyyMMdd_HHmmss"})You can modify this expression as per your requirement.
- What if you want to process each file exactly once until it’s updated with new content?
- Use the Watermarking mode. This stores the file as a key-value pair in the Object Store, where the key is the filename and the value is the created or updated time based on your configuration. By default, this is disabled, but enabling it ensures each file is processed only once.
- What if you want to delete the file after processing?
Similar to the examples above, there are many other use cases that Mule supports. You just need to explore the configuration options for the File module to implement them.
As part of this article, we have covered only the Write and On New or Updated File components, others are quite straightforward. Please go through them and let us know in the comments if you need a detailed explanation for any specific component.
Awesome post.