What is DSP Page ?
- DSP page stands for Dynamic Server Pages in webMethods.
- DSP is a standard feature which is used to create dynamic web pages in webmethods and communicate to the backend webmethods flow and java services.
- DSP pages enable developers to create web content that adapts to user interactions and efficiently communicates with webMethods backend processes and services.
- DSP pages can written using html,css and javascript , and to communicate with the backend service we will use the dsp page tags enclosed in % symbols (e.g., %invoke …%).
- DSP page should be saved using the “.dsp” file extension.
- We don’t need buy any hosting to host our .dsp pages, we can host dsp pages in our integration server itself.
Characteristics of DSP Page :
- Dynamic Content : DSP page allows us to create webpage with dynamic content, these content can be changed based on the user interaction and the backend service response.
- HTML and Server-Side Scripting : DSP page usually written using html,css to build the page structure with colors and we can embed javascript for server-side scripting.
- Integration Capabilities : DSP page allows us to communicate to webmethods service and handle the both error and success response.
- Authentication : We can implement access control mechanisms to restrict access to certain DSP pages or sections of the pages based on user roles and permissions.
Create a DSP Page Add it to Administration page :
- Create a package with name ‘HG_DSP_Demo'(We are going to use this package for the exercise today, you can create your own or use existing package).
- Create below folder structure.

- Now navigate to your package backend file location and create file with name index.dsp inside ‘pub’ folder of your package.
Ex – ‘C:SoftwareAGIntegrationServerinstancesdefaultpackagesHG_DSP_Demopub’. - Now add below sample html code into your index.dsp page and save it.
<!DOCTYPE html>
<html>
<head>
    <title>My First DSP Page</title>
</head>
<body>
    <h1>Hello, world!</h1>
</body>
</html>- We have created our first dsp page, now open browser and point to http://hostname:port/package name/dsp pagename.dsp, you will be able to see the page with ‘Hello world!’ written in it.

- Let’s add a option in the solution section of the integration server to access our dsp page.
- Create a service inside util folder with name ‘setSolutionParameter’ and create below variables in the service output section.

- Add one map step and hard code below variables.
- name : First DSP Page(Option name that you want to be added into Solution tab).
- text : First DSP Page.
- url : ../HG_DSP_Demo/index.dsp (path of the dsp page).
- target : index.dsp.

- Create one more service inside util folder with name ‘createSolution’.
- Invoke ‘wm.server.ui:addSolution’ inside ‘createSolution’ service.Note : This service resides in WmRoot package which may not be visible to you, so follow below septs to make it visible.
- Open integration server page and click on ‘Extended’ option under ‘Settings’ tab.
- Click on search button and search with ‘WmRoot’, it will show you ‘watt.server.ns.hideWmRoot’ property, select it and click apply.

- Edit the property to false and then refresh the server in designer to see the WmRoot package.
- Now hard code the callback service input with the full path of the set solution parameter service.

- Now run the ‘createSolution’ service and refresh the intergration server page, you will see the new option which we have added under solution tab.
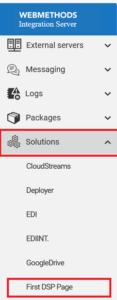
- If you will click on the ‘First DSP Page’ option , it will take you to the index.dsp page.
- We need to add the ‘createSolution’ to the startup service of the package ,otherwise when ever the server will be restarted the option will be removed from the solution tab.
- In designer , right click on the package–> click on properties.
- Click on startup/shutdown services option –> select the ‘createSolution’ service and click right arrow button and then click ‘Apply and Close’ button to save it.

- Now if the server restarts the ‘createSolution’ service will be executed once the package is loaded and we will not lose the option from the solution tab.


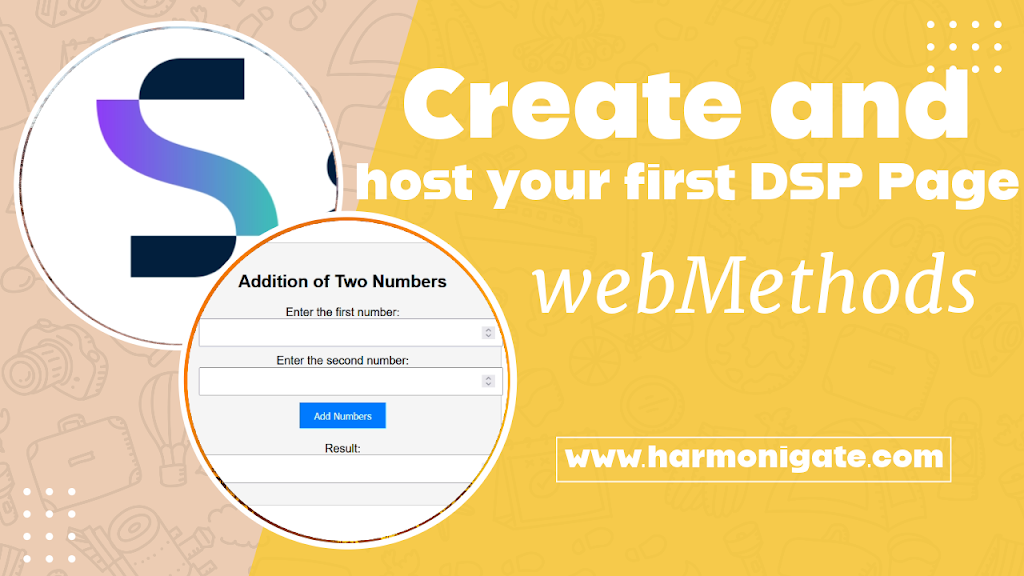
Exercise: Create a DSP page to implement the addition of two numbers and populate the result on the DSP page.
- Update the index.dsp page of the ‘HG_DSP_Demo’ with the below code.
<!DOCTYPE html>
<html lang="en">
<head>
    <meta charset="UTF-8">
    <meta name="viewport" content="width=device-width, initial-scale=1.0">
    <title>Addition of Two Numbers</title>
    <style>
        body {
            font-family: Arial, sans-serif;
            text-align: center;
        }

        .container {
            margin: 50px auto;
            padding: 20px;
            border: 1px solid #ccc;
            max-width: 400px;
            background-color: #f5f5f5;
        }

        input[type="number"] {
            width: 100%;
            padding: 10px;
            margin-bottom: 10px;
        }

        button {
            background-color: #007bff;
            color: #fff;
            padding: 10px 20px;
            border: none;
            cursor: pointer;
        }

        #result {
            margin-top: 20px;
            font-weight: bold;
        }
    </style>
</head>
<body>
    <div class="container">
        <h2>Addition of Two Numbers</h2>
        <form id="additionForm">
            <label>Enter the first number:</label>
            <input type="number" name="num1" required>
            <br>
            <label>Enter the second number:</label>
            <input type="number" name="num2" required>
            <br>
            <button type="submit">Add Numbers</button>
        </form>
        <br>
        <label>Result:</label>
        <input type="number">
        <br>
    </div>
</body>
</html>
- Update the index.dsp page of the ‘HG_DSP_Demo’ with the below code.
- Now if you notice we have added a name property for both the input with names ‘num1’ and ‘num2’ so the backend service will receive two inputs with names ‘num1’ and ‘num2’.
- Create a flow service with the name ‘additionOfTwoService’ under the services folder.
- Create two input variables with the name ‘num1’ and ‘num2’ and one output variable with the name ‘result’.
- Add the branch step and set the ‘Evaluate label’ to ‘true’.
- Inside the branch invoke ‘pub.math:addInts’ and in the level property add ‘%num1%!=$null && %num2%!=$null’ condition, this will allow us to check if the input is having value, if you are not getting this please click here to check out our article on branch step.
- In the ‘pub.math:addInts’ service perform below mapping.

- Inside branch add one map step and set the label to ‘$default’ and in comment mention do nothing.
- Now update the HTML code to invoke our flow service and handle the response.
%invoke HG_DSP_Demo.v1.services:additionOfTwoService%
    <label>Result:</label>
    <input type="number" value='%value result%'>
    <br>
    %onerror%
        <script>
            alert('%value errorMessage%');
        </script>
    %endinvoke%

- Now let’s understand the above code.
- %invoke HG_DSP_Demo.v1.services:additionOfTwoService% has been added to call ‘additionOfTwoService’ service.
- %value result% is used to extract value of result varible and load it in the result field.
- %onerror% is added to extract the service error or exception.
- %value errorMessage% is added to extract the error message.
- %endinvoke% is added to close the invoke boundary.
- As of now we have completed the development, let’s test it.
- Congratulation , we have completed our first dsp page project.


In this article we have created the basic DSP page, please stay tuned we are going to publish more on it. Click below download button to download the project resource.