
Overview
This article will guide you through the overall procedure to install universal messaging in Google Kubernetes Engine. GKE allows you to easily scale your application horizontally by adding or removing nodes in the cluster. It provides features like automatic load balancing and redundancy, which contribute to high availability. We will dive deep into the step-by-step procedure required for the universal messaging setup in GKE.
Prerequisites
- GCP account with a project.
- Basic understanding of container architecture.
- Basic UM understanding.
Install UM in GCP docker :
On Google Kubernetes Engine (GKE), you create containerized applications using tools like Docker. These containers bundle your application and its dependencies. GKE handles the management of infrastructure, container runtime, orchestration, and scaling automatically, allowing you to focus on your application without dealing with the underlying complexities.
- GCP comes with a pre-installed docker, open the cloud shell by clicking on the ‘Activate Cloud shell‘ link in the upper right-hand side of the GCP console screen.

- Run the below command to set the default project for the
gcloudcommand-line tool and don’t forget to replace the ‘YOUR_PROJECT_ID‘ with your actual project ID.
gcloud config set project YOUR_PROJECT_ID
- Run the below command to pull the universal messaging 10.15 image from the docker hub.
docker pull softwareag/universalmessaging-server:10.15
docker pull: This is the Docker command used to pull images from a registry.softwareag/universalmessaging-server: This is the name of the Docker image followed by the registry name.10.15: This is the tag associated with the Docker image.
- Run the below command to start a new container based on the docker image.
docker run -d -p 9000:9000 --name hgumcontainer softwareag/universalmessaging-server:10.15
docker run: This is the main command to run a Docker container.-d: This flag stands for “detach.” It runs the container in the background.-p 9000:9000: This option maps port 9000 on the host machine to port 9000 on the container.--name hgumcontainer: This option assigns a name (hgumcontainer) to the running container.softwareag/universalmessaging-server:10.15: This is the Docker image name.
- In GCP we have a ‘ Container Registry‘ that provides secure, private Docker repository storage on Google Cloud, for more details please click here to check out the official documentation.
- Before pushing the image to the ‘Container Registry,’ it needs to be tagged. Run the following command to apply a new tag to the image:
docker tag softwareag/universalmessaging-server:10.15 asia.gcr.io/harmonigate-dev/myharmonigateum
docker tag: This is the command used to create a new tag for a Docker image.softwareag/universalmessaging-server:10.15: This is the original Docker image, including its name and tag.us.gcr.io/harmonigate-dev/myharmonigateum: This is the new image name and tag to be associated with the original image. It follows the format<registry>/<repository>/<image-name>:<tag>.asia.gcr.io: This is the container registry URL. Images can be stored in different container registries like us.gcr.io/eu.gcr.io etc.harmonigate-dev: This is the projectId.myharmonigateum: This is the new name/tag assigned to the image within the specified repository.
- Run the below command you will see the images.
docker images
- Before pushing the image to Google Container Registry, you need to enable the ‘Google Container Registry API‘ Search for ‘Container Registry‘ in the Google Cloud Console, and then enable the ‘Google Container Registry API‘.
- Run the below command to push the image to the container registry.
docker push asia.gcr.io/harmonigate-dev/myharmonigateum
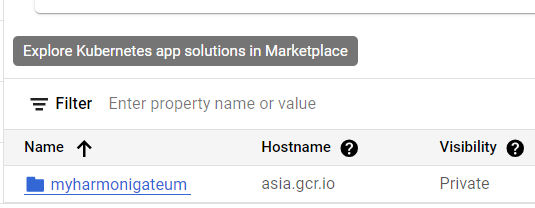
- If your command runs successfully, you will be able to see the image in the registry, as shown below.
- In case you encounter a permission error, execute the following command, and then rerun the previous command.
gcloud auth configure-docker

Y
- If your command runs successfully, you will be able to see the image in the registry, as shown below.
Creating GKE cluster :
- Before creating a GKE cluster, it’s essential to enable the Google Compute Engine (GCE) API for Google Kubernetes Engine (GKE). GKE leverages the underlying Compute Engine infrastructure to effectively manage and run Kubernetes clusters.
- Run the below command to enable compute engine API.
gcloud services enable compute.googleapis.com
- Run the below command to specify the compute zone for our application, you can specify the zone as per your requirement.
gcloud config set compute/zone asia-southeast1-a
- Run the below command to enable ‘Kubernetes Engine API‘.
gcloud services enable container.googleapis.com
- Run the below command to create a GKE cluster with one node.
gcloud container clusters create harmonigate-cluster --num-nodes=1
gcloud container clusters create: This is the main command to create a new GKE cluster.harmonigate-cluster: This is the name given to the GKE cluster. You can replace “harmonigate-cluster” with your preferred name.--num-nodes=1: This flag specifies the number of nodes to be created in the default node pool of the GKE cluster, here the number of nodes is set to 1.
- Now, we need to configure ‘kubectl‘ (Kubernetes command-line tool) to communicate with our Google Kubernetes Engine (GKE) clusters. To achieve this, we retrieve the credentials for the GKE cluster and configure the local ‘kubectl‘ to use those credentials.
- Run the below command to configure ‘kubectl‘ to use the cluster that we have created.
gcloud container clusters get-credentials harmonigate-cluster
gcloud container clusters get-credentials: This is a GCP command that retrieves the credentials for a specified GKE cluster.harmonigate-cluster: This is the name of the GKE cluster for which you want to retrieve the credentials.
Deploy Image to GKE cluster :
- Run the below command to deploy the image to the GKE cluster.
kubectl create deployment harmonigate-um-gke --image=asia.gcr.io/harmonigate-dev/myharmonigateum
kubectl create deployment: This is thekubectlcommand to create a new deployment.harmonigate-um-gke: This is the name you are giving to your deployment.--image=asia.gcr.io/harmonigate-dev/myharmonigateum: This flag specifies the container image to be used for the deployment.
Expose IP :
We have our image running in the GKE cluster but we need to expose its IP so that we can access the UM from outside.
- Run the below command to expose the IP to the external network.
kubectl expose deployment harmonigate-um-gke --type LoadBalancer --port 9000 --target-port 9000
kubectl expose deployment: This is thekubectlcommand to create a new service that exposes a deployment.harmonigate-um-gkeum-gke: This is the name of the deployment you want to expose. Replace it with the actual name of your deployment.--type LoadBalancer: This flag specifies the type of service to create. In this case, it’s a LoadBalancer service. A LoadBalancer service exposes your deployment externally by provisioning a cloud provider’s load balancer.--port 9000: This flag sets the port on the service that external clients will use to access the service.--target-port 9000: This flag sets the target port on the pods in the deployment. In this case, it’s set to 9000, which means the service will forward incoming traffic to the pods on port 9000.
- Run the below command to get the details of the service and note the external ip.
kubectl get service harmonigate-um-gke

Connect UM Running in GKE to the UM Enterprise manager locally:
- Open the UM Enterprise Manager by running “C:/SoftwareAG/UniversalMessaging/java/umserver/bin/nenterprisemgr.exe” exe file.
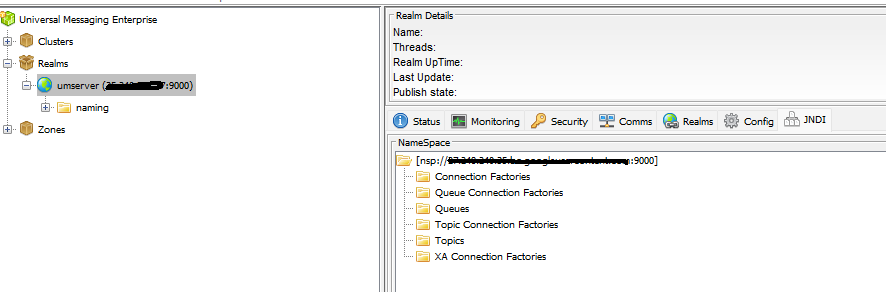
- Once the Enterprise Manager is opened you will be able to see the below options.

- Right-click on “Realms” -> “Connect to Realms,” fill in the “RNAME” with “nsp://External endpoint of GKE Cluster:9000,” and then click ‘OK’ to connect.
- Once you have connected successfully you can create Connection Factory/QUEUE/Topics as per your needs.
Hope you have enjoyed this article and found this to be helpful!! Cheers!!
Great Blog !! Thank you 🙂
Thank you!, your feedback means a lot!